18 Garland on Mantel Ideas With the Pool-Noodle Fullness Shortcut
02 july 2026How to hang garland on a mantel gets easier once you build the hidden spine first. I learned that after one outdoor setup where I kept adding more cedar, more ribbon, and more lights, and the whole fireplace still looked skinny by dusk.
- ✓ Wrap the pool noodle in cedar garland
- ✓ Wire greenery around the mantel posts
- ✓ Build fullness with hidden zip ties
Your eye doesn't want more stuff. It wants one strong shape, then a few smart layers. The pool-noodle shortcut is the move that fixes the silhouette before you spend another dollar on greenery, and it's also the reason your backyard mantel can look genuinely lush without doubling the budget.
- Wrap the pool noodle in cedar garland
- Wire greenery around the mantel posts
- Build fullness with hidden zip ties
- Drape asymmetrical swags over one corner
- Layer eucalyptus through the cedar base
- Hook garland under the mantel lip
- Tuck solar fairy lights between branches
- Anchor the corners with brick clips
- Cascade ribbon tails down one side
- Cluster pinecones near the outdoor lanterns
- Weave olive branches through the greenery
- Secure the center with removable hooks
- Frame the firebox with matching garland drops
- Add weatherproof ornaments in matte brass
- Lift the garland with hidden floral wire
- Style the hearth with potted evergreens
- Trail extra greenery toward the seating area
- Finish with lanterns tucked below the swag
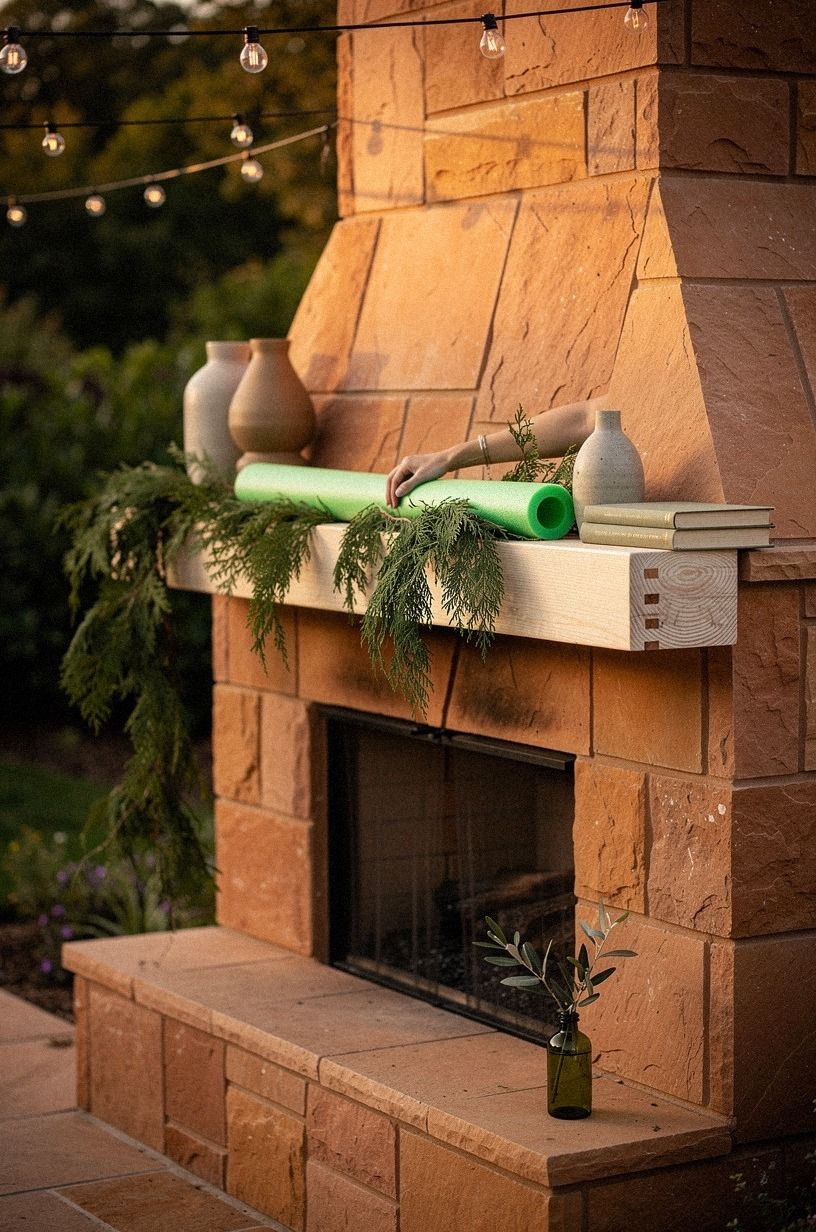
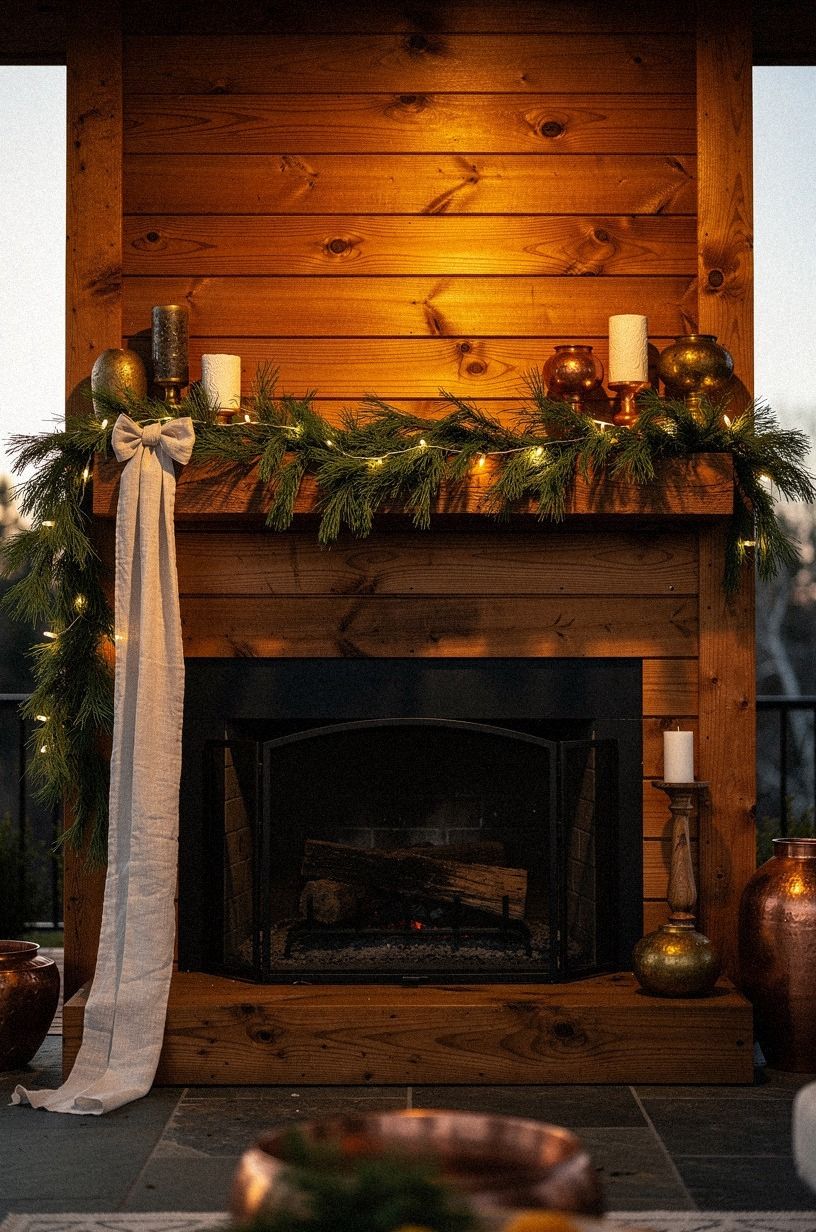
1Wrap the pool noodle in cedar garland
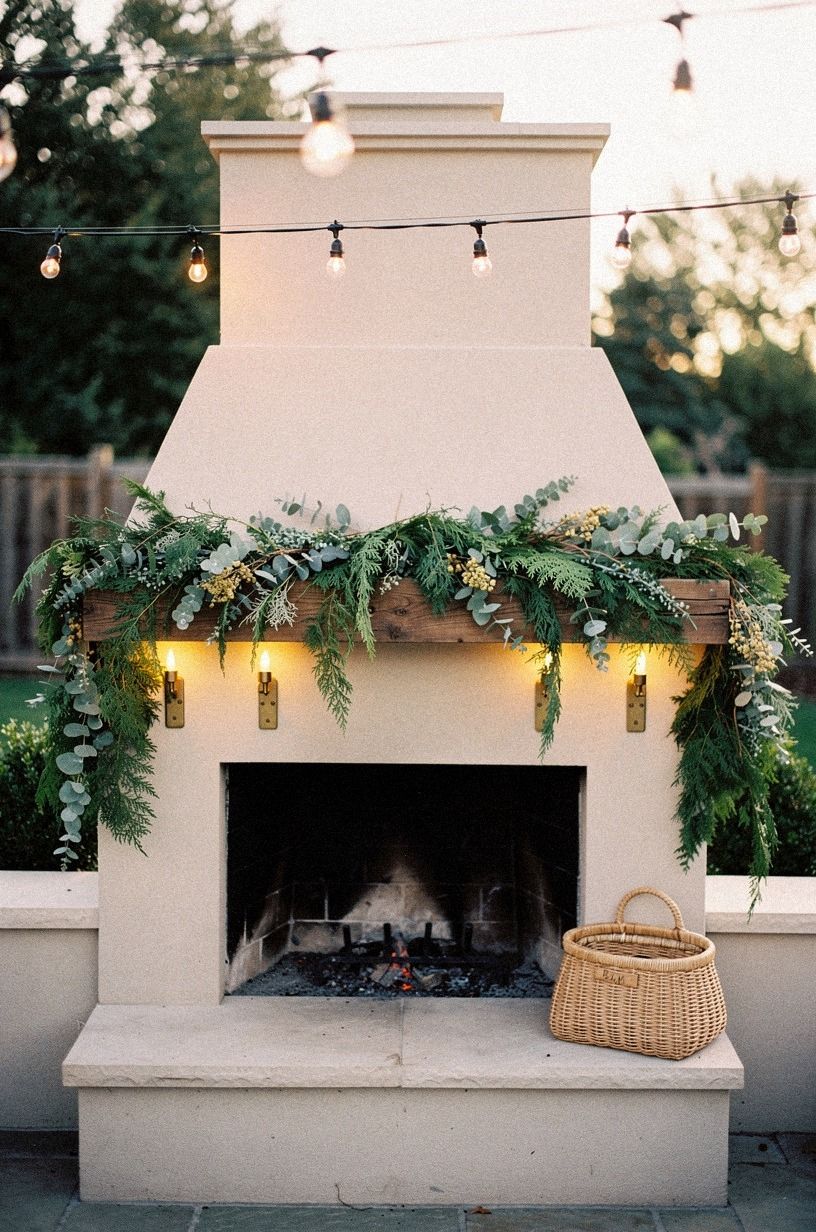
Start here, because the pool noodle is what gives you that generous line across the mantel without asking the cedar to do all the work by itself. I use a firm cedar garland first, then wrap it around the noodle so the bulk reads rounded from the lawn instead of flat against the stone. If your outdoor fireplace is wide, this move saves you from buying two extra strands just to fake volume.
I like the noodle centered across the top third of the opening so your decorated top of fireplace still shows real architecture underneath. And keep the wrapping slightly loose. Too tight and the branches point in one harsh direction.
Too loose and your shape slumps by evening. A standard 1.5-inch diameter foam noodle in the 5-foot length is the right starting point for most mantels, and you can join two together with a wooden dowel for wider openings. You will not regret this move.
The part that worked for me was leaving a little irregularity in the branch tips so the finished line looked grown, not manufactured. You can see it from a diagonal yard view right away.
That's the fullness move I wouldn't skip. Huge difference!
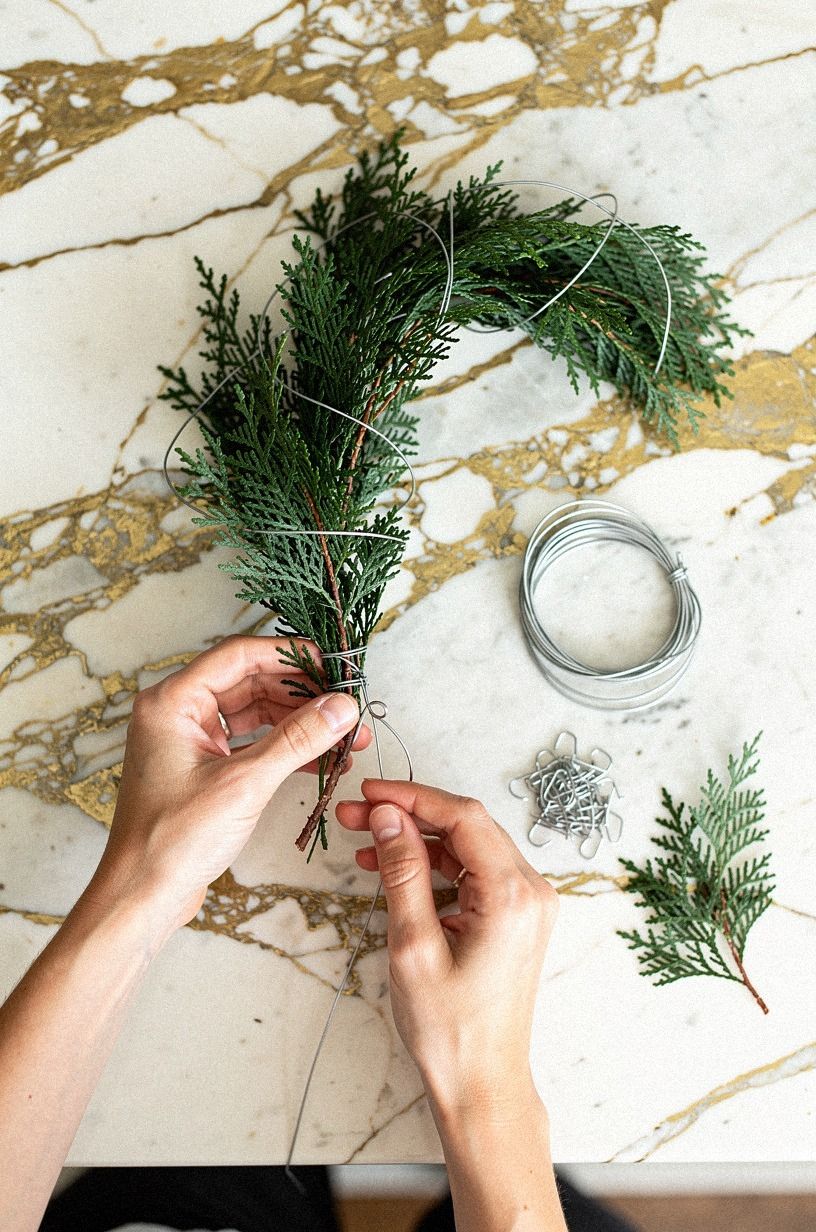
2Wire greenery around the mantel posts
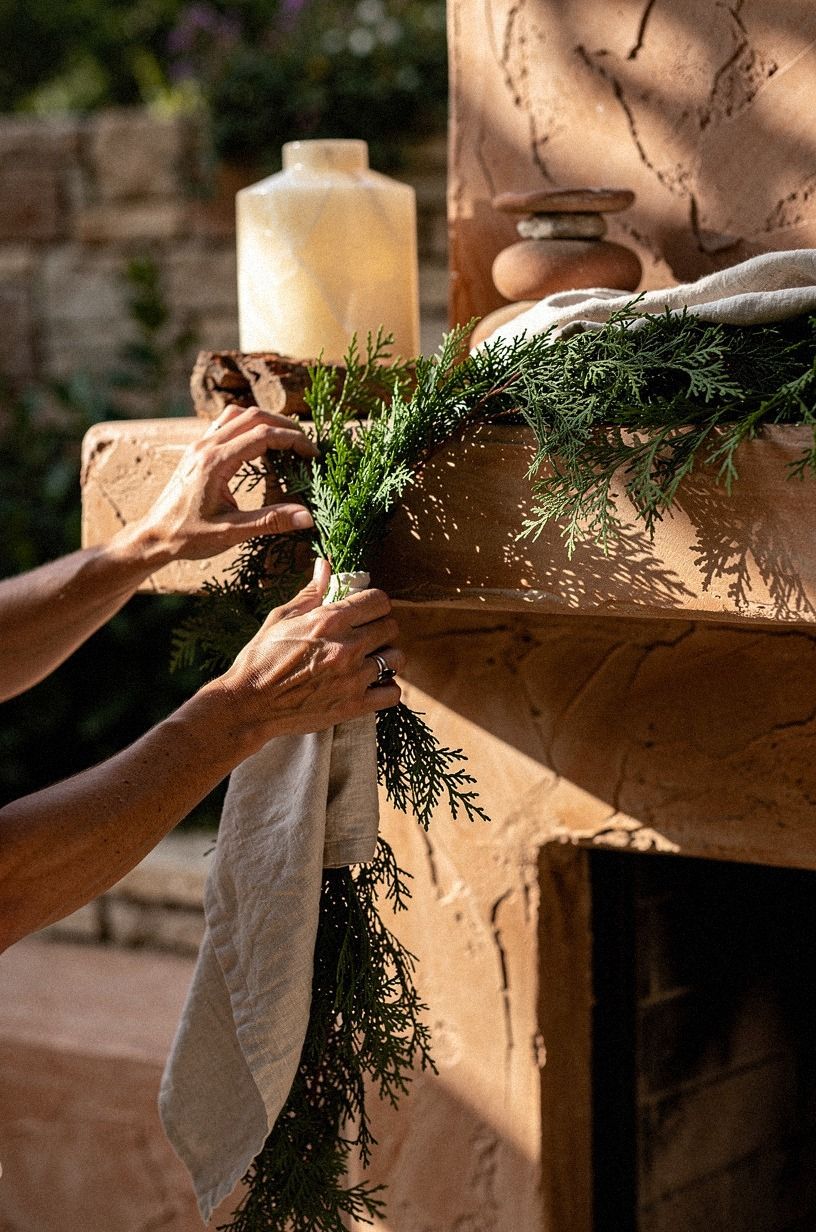
Once the top line is set, wire the greenery around the mantel posts so the whole fireplace reads as one frame instead of one shelf with leftovers. I anchor the cedar with thin green floral wire at three points per post, then tuck the cut ends behind the bracket so nothing catches the eye from the patio. If you're styling the whole backyard zone, my cozy backyard decor guide walks through the rest of the layering.
You don't need much tension. Just enough that the greenery follows the post instead of floating in front of it.
And keep the wire tone on the cool green side so it disappears inside the cedar instead of flashing against limestone or stacked slate. Solid move if you're building toward a wider cozy backyard aesthetic refresh.
3Build fullness with hidden zip ties
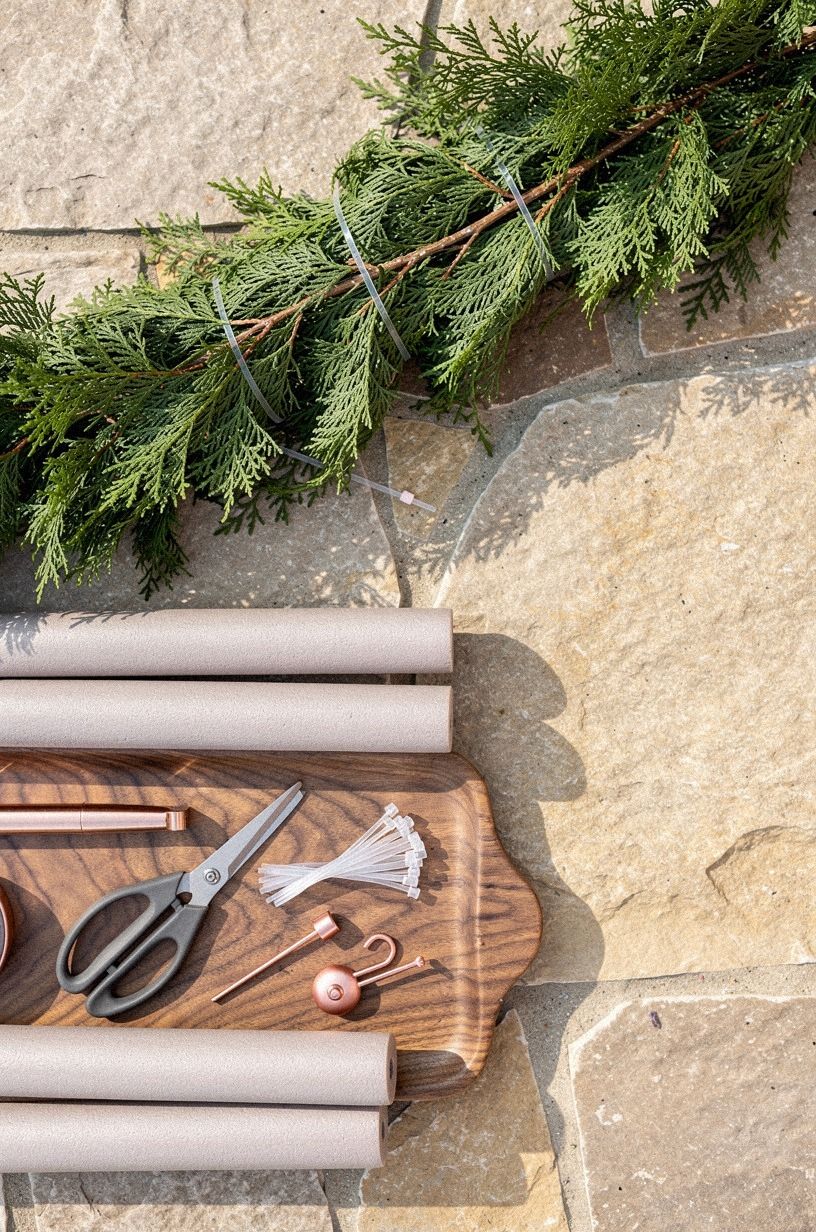
This is the step that makes a modest strand look like you spent more than you did.
4Drape asymmetrical swags over one corner
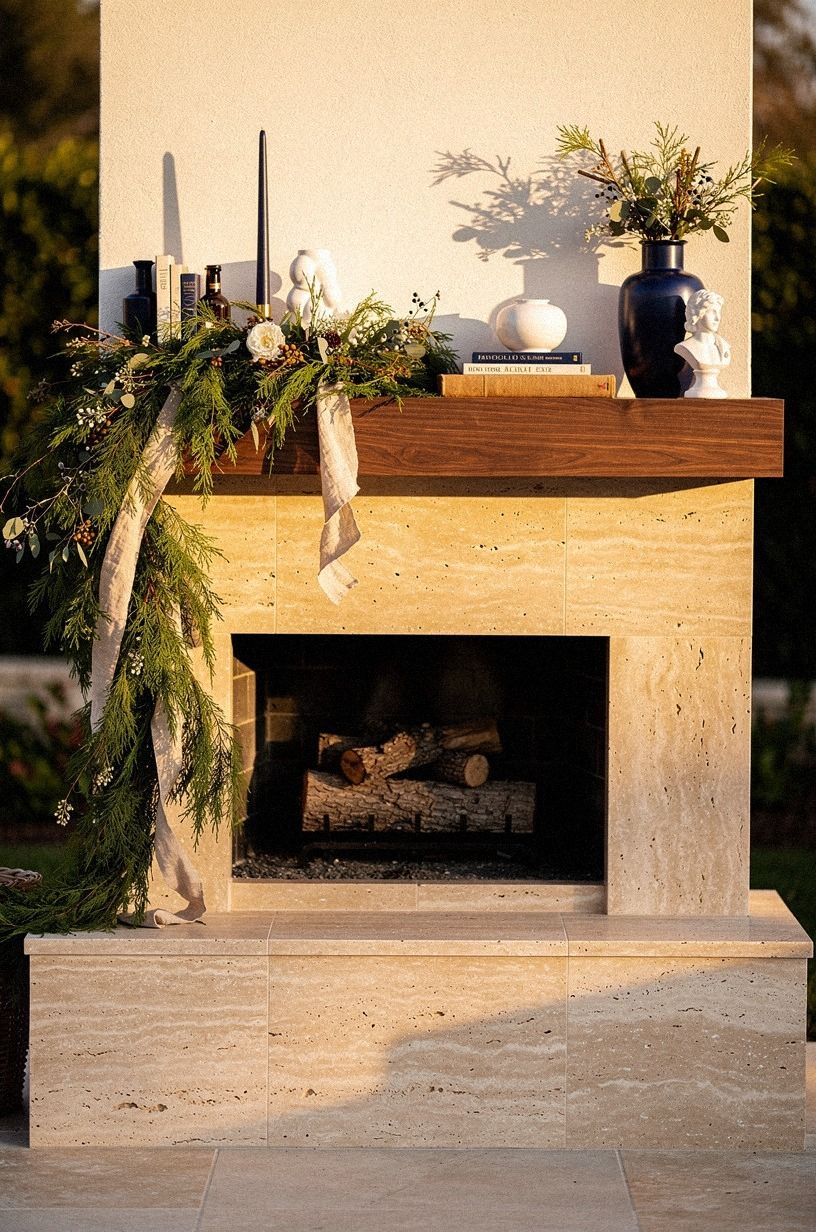
A perfect U-shape can feel too polite outdoors, especially on a backyard fireplace that already has a strong rectangular face. I prefer one longer swag on a single corner so your eye travels down and away from the center. That softer imbalance makes the whole mantel decorating tips formula feel more natural, and it's the move that separates a tidy line from a magazine one.
Use one weightier cedar swag on the dominant side and let the opposite side stay shorter and cleaner. If your seating area sits to the left, let the longer drop go left so the greenery visually reaches toward the chairs.
You want movement, not symmetry for symmetry's sake. If you're planning around a longer L-shaped patio, my pergola vs gazebo guide keeps the drop line flowing toward the rest of the seating.
And don't drag the swag all the way to the hearth. A shorter fall usually looks more expensive because the mantel still reads like architecture, not costume. West Elm's faux cedar swag in the 8-foot size holds its shape outdoors surprisingly well, and the muted tone flatters a real cedar base rather than competing with it.
5Layer eucalyptus through the cedar base
Cedar gives you body, but eucalyptus gives you air. I tuck three to five silver-dollar eucalyptus stems at even intervals so the rounded blue-green leaves break up the dark cedar and the whole line reads softer from the patio. If you want a quieter backdrop on the surrounding seating, my modern cozy backyard guide shows how the same palette keeps working all winter.
Don't overdo it. Two stems per foot is the soft maximum, and I'd skip eucalyptus entirely if your mantel faces harsh afternoon sun because the leaves crisp by week two. A quick mist of water at dusk keeps the silver-dollar leaves supple for the next morning.
6Hook garland under the mantel lip
If the garland keeps creeping forward, hook it under the mantel lip instead of fighting gravity from above. I use small outdoor cup hooks or removable hooks on the underside where nobody sees them from the patio door. That under-mantel anchor keeps the front edge clean and stops the greenery from sagging in the middle after a windy night.
This works best when your mantel has a real lower lip to catch the line. If yours is shallow, space the hooks evenly and keep the branches fluffed so you don't reveal the hardware. But don't rely on top-only attachment if you want a broad, rounded front.
It almost always collapses by day two. Game changer when the fireplace faces an open lawn with no windbreak.
I learned that one the annoying way. The garland looked fine at noon, then tired by dinner. Hidden support under the shelf fixes that without adding visual clutter, and a single galvanized steel hook every 16 inches is plenty for a six-foot mantel.
7Tuck solar fairy lights between branches
Outdoor garland without light can look finished at noon and invisible at eight. I weave a thin strand of solar fairy lights through the cedar every 8 to 10 inches, solar panel hidden on the top edge so it grabs the last afternoon light. For the broader lighting plan around the fireplace, my backyard string lighting guide covers the warm bulbs that pair best with cedar.
Warm white only, around 2700K, and skip anything that flashes or changes color. You want the cedar to glow, not perform.
Copper-wire strands disappear into the branches better than green-wire strands when the foliage thins out. A 30-foot solar strand with 100 micro-LEDs is the right density for a six-foot mantel.

8Anchor the corners with brick clips
When the fireplace face is brick, clips beat guesswork every single time. I use sturdy brick clips at the outer corners so the garland weight gets carried by the masonry itself, not by one overworked string in the middle. That matters if your cedar is damp, your ribbon is heavy, or your mantel is wider than it first looks.
The relaxed three-quarter view is where you can tell whether the corners are doing their job. If the ends kick upward, the clip placement is too high.
If they droop, the clips are too loose or too far inward. You want a slight outward pull so the center line looks supported, not suspended.
Standard wire brick clips from the hardware store hold about 10 pounds each, which is more than enough for a wet cedar strand.
But don't force clips onto brittle mortar joints. If the brick face won't take them cleanly, swap to removable outdoor hooks and keep the corners lighter. A chipped edge isn't worth a prettier December photo.
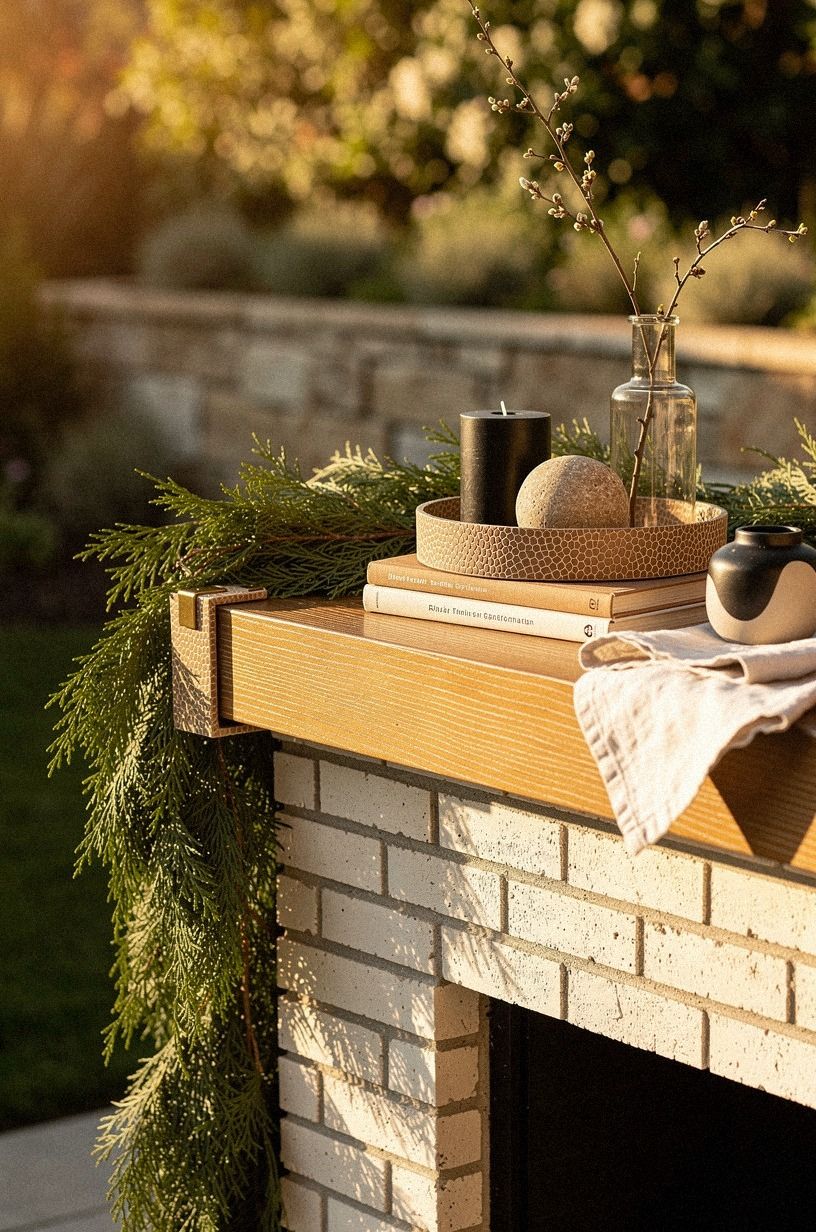
9Cascade ribbon tails down one side
Ribbon looks best when it behaves like a supporting note, not the entire performance. I let two or three tails of wired linen ribbon fall down one side of the cedar so the branches still lead and the ribbon simply extends the motion.
If you use a low floor-level view, those tails give you a cleaner vertical line than another bulky swag would. Solid move if you're building toward a cozy backyard dinner party look.
Stick to matte ribbon outdoors. Satin flashes too hard in daylight and can look oddly formal against rough stone or brick. I like a width around 2 inches because it holds shape without turning the corner into a gift wrap situation.
A roll of raw Belgian linen ribbon from The Cottonery in a 3-inch width runs around $18 for 10 yards, which is enough for a full mantel plus spares.
And keep the ribbon on the same side as your longer greenery drop. Separate them and your eye has to pick a direction.
Together, they read deliberate. Cut the tails at slightly different lengths, around 24, 28, and 32 inches, so they fall in a soft cascade instead of a stiff stack.
10Cluster pinecones near the outdoor lanterns
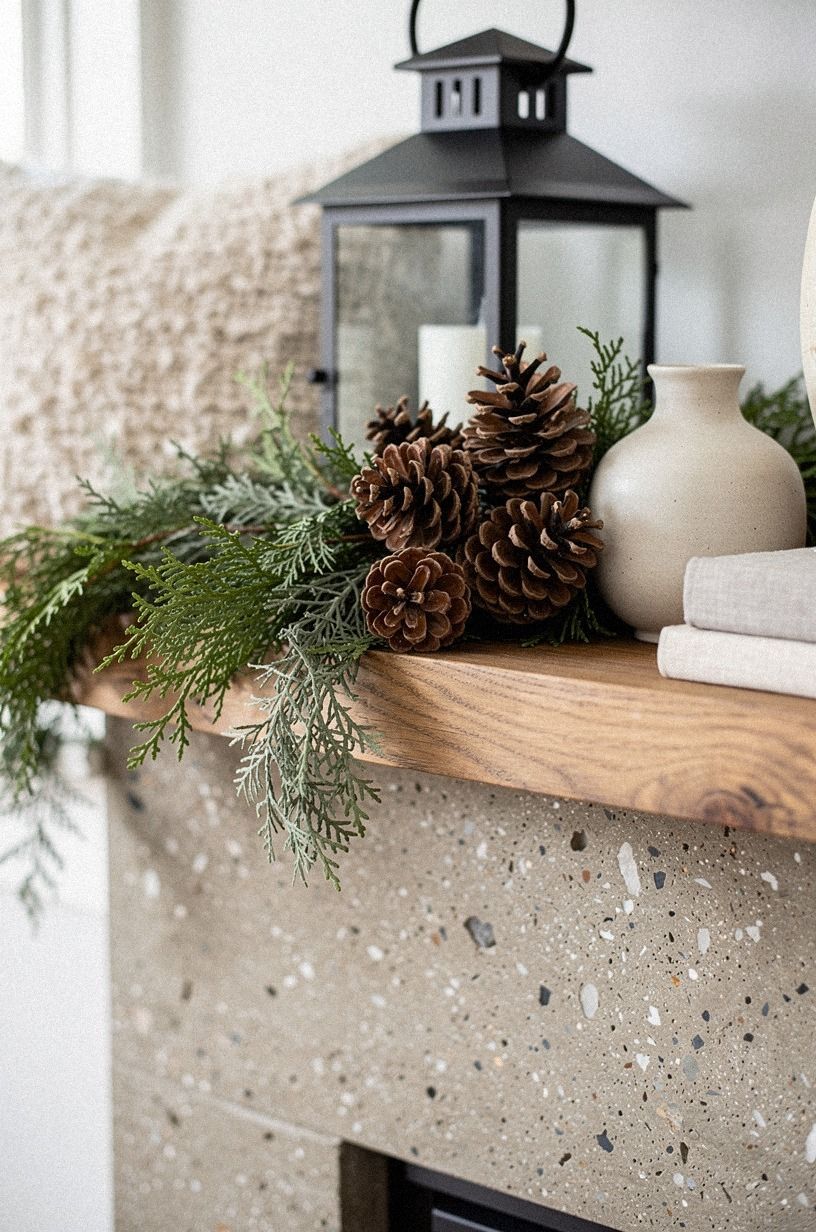
This is where you make the lower half of the fireplace talk to the upper half.
11Weave olive branches through the greenery
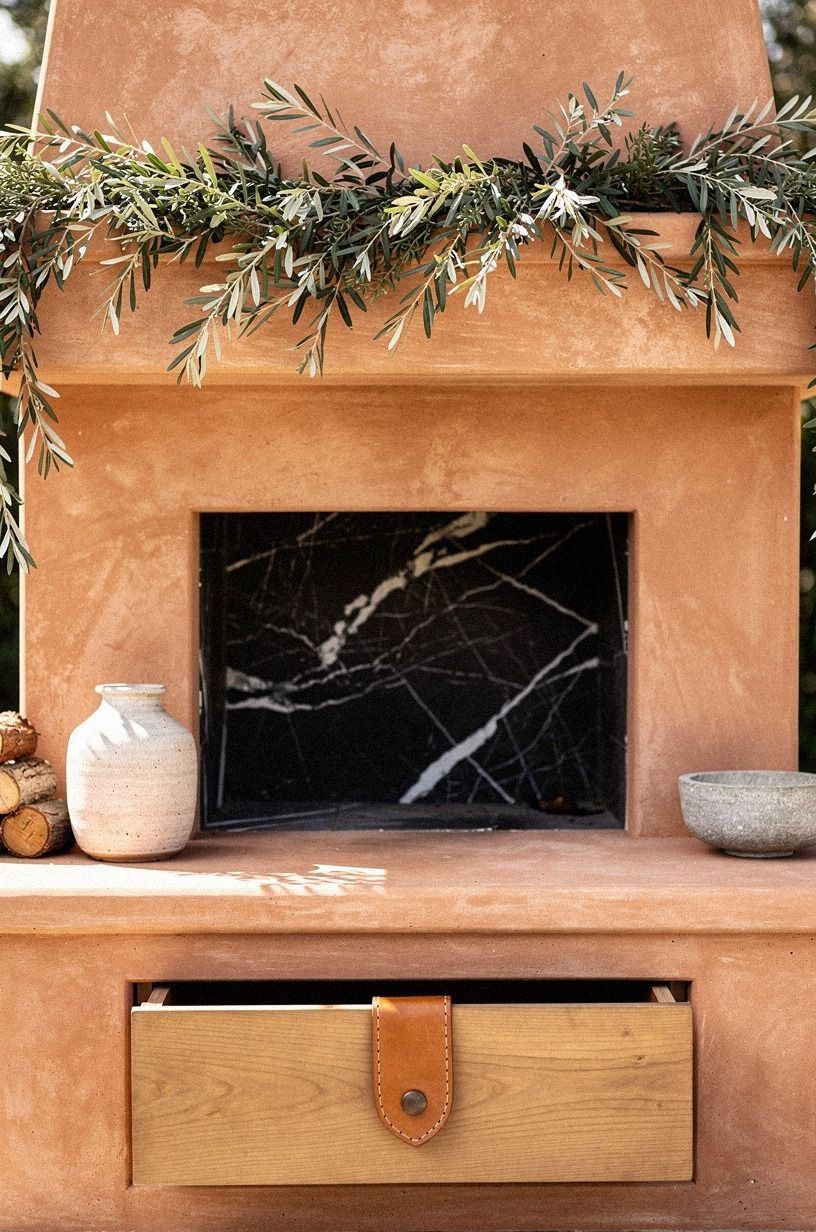
Olive is the cleaner cousin to eucalyptus when you want less softness and a little more line. I slide stems of olive branch through the cedar so the narrow leaves stretch horizontally and give the garland a quieter silhouette.
If your outdoor fireplace leans Mediterranean or you have pale stucco nearby, this move looks especially right. For the bigger backyard layout decisions, my create a cozy backyard from scratch guide lays out the order I'd plant in.
You don't need many stems. Three or four passes across a standard mantel is enough to change the rhythm. Too much olive and the cedar disappears.
Too little and you miss the elegant contrast that makes the branch mix interesting from ground level.
But watch the color balance. Olive loves a warm painted surround like Sherwin-Williams Emerald Exterior, while brighter cool greens can start fighting it (and yes, it matters). That is the line I would hold.
12Secure the center with removable hooks
The center is where outdoor garland usually tells on itself. I drop one clear removable hook at the back-center of the mantel and run a hidden loop of green wire from the hook down to the noodle base. That single anchor keeps the middle from sagging by the second evening, especially after rain or heavy dew.
If your mantel is renter-friendly, swap to Command outdoor hooks in the medium size. They hold a full cedar strand for a full season and come off clean when the holidays end. I learned that one the hard way on a brick rental in 2022.
13Frame the firebox with matching garland drops

If the fireplace opening looks disconnected from the shelf, add matching drops on both sides of the firebox so the whole composition reads like one frame.
14Add weatherproof ornaments in matte brass
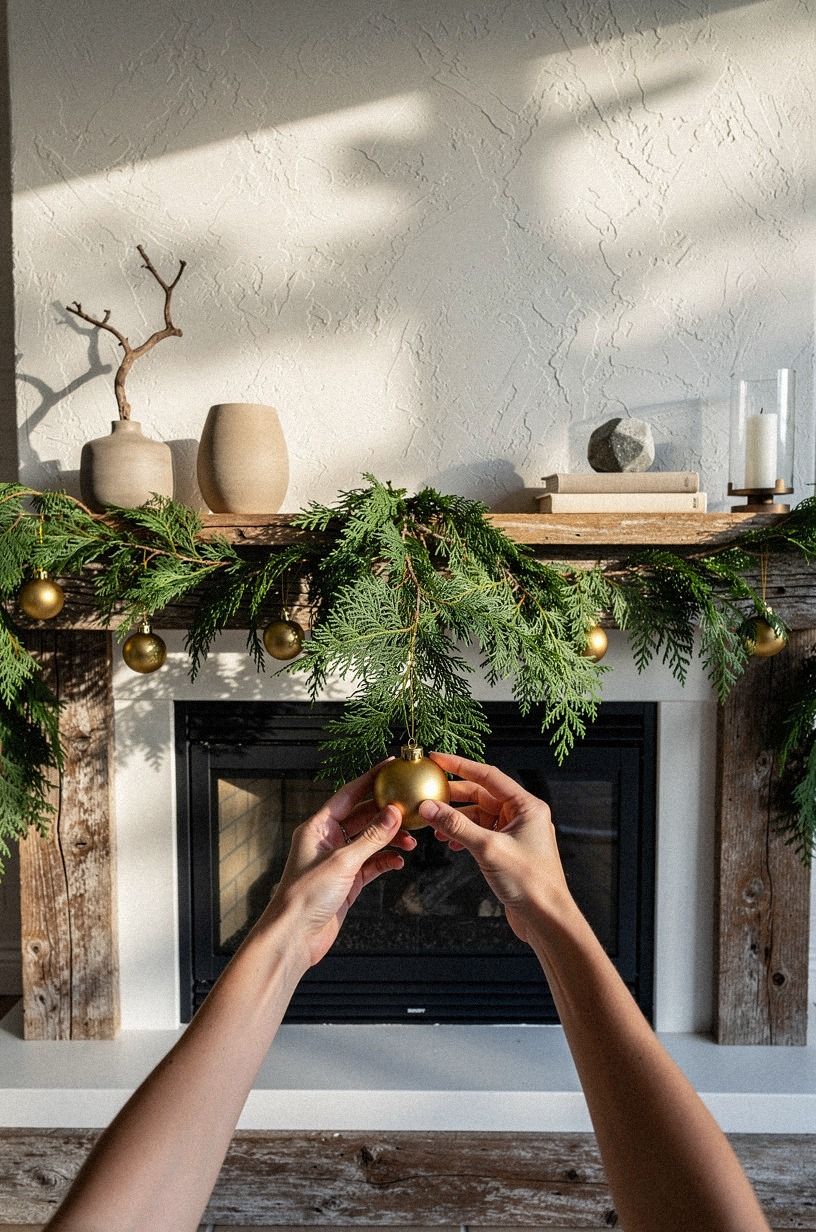
I don't add ornaments until the greenery already looks complete on its own. Then I tuck in a few matte brass ornaments where the branch line needs tiny points of reflection, not everywhere. Outdoor light is already busy, so you want a restrained metal note that glows softly instead of flashing in every direction.
Use weatherproof finishes only, especially if the mantel sits under open sky or catches damp morning air. A soft brass tone looks richer against cedar than silver does, and it picks up lantern light beautifully after sunset.
I usually keep them closer to the center third and one side, never in strict repeats. CB2 does a clean small brass ball around $14 for a set of six, and it survives real weather better than the cheap craft-store versions.
And I'd skip anything glittered. Glitter outdoors turns cheap fast.
A few quiet brass rounds do more for you than a dozen loud ornaments ever will. Total worth it.
15Lift the garland with hidden floral wire
When the noodle base still needs a little rise, hidden green floral wire is what gets you there.
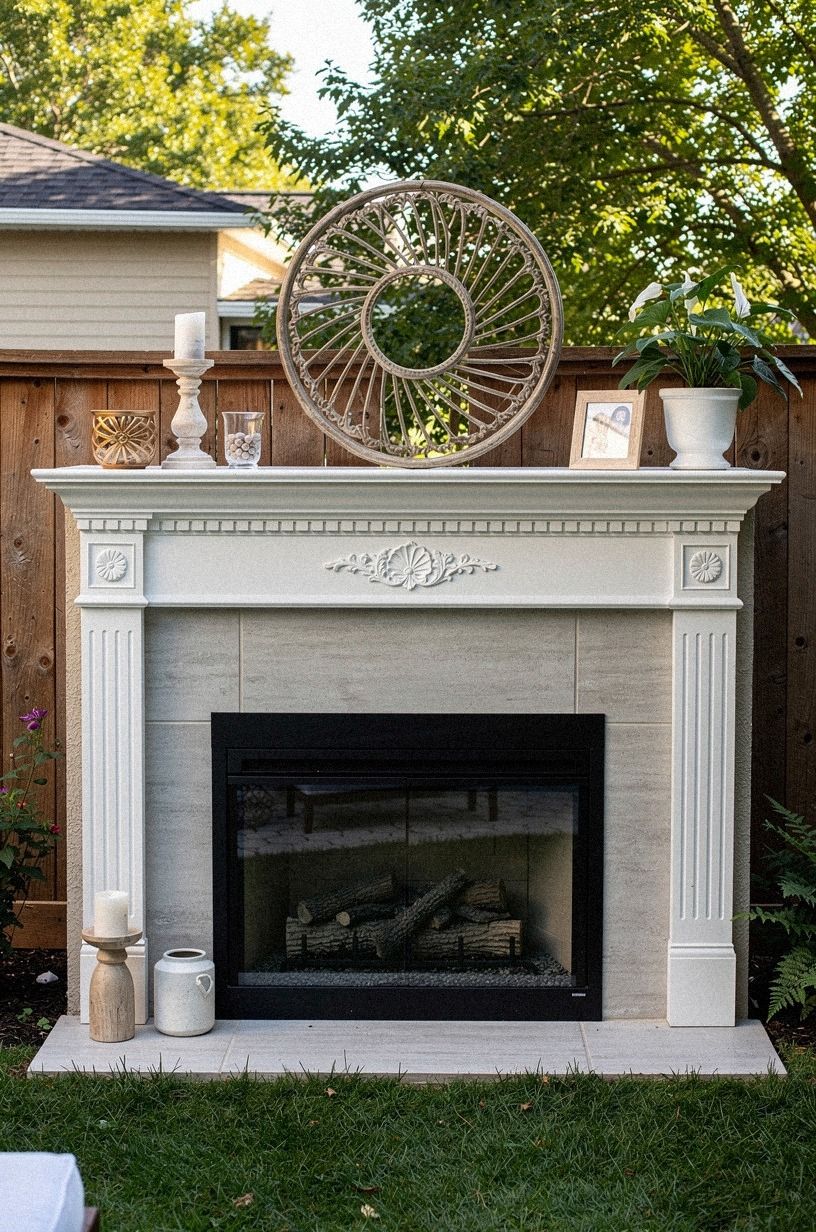
16Style the hearth with potted evergreens
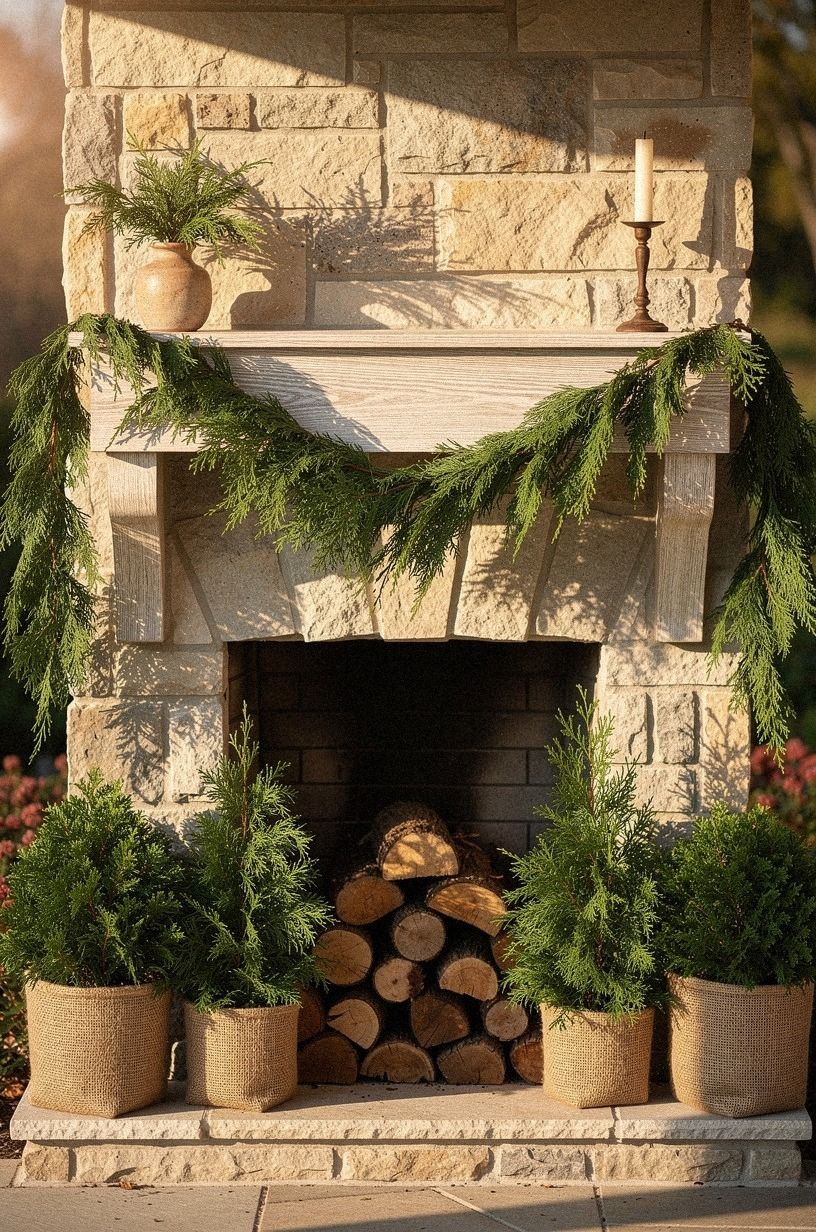
A garland alone can leave the fireplace feeling top-heavy, so I style the hearth with dwarf Alberta spruce or other potted evergreens underneath. Two matched pots, set at the outer corners of the firebox, ground the whole frame and let the greenery above feel intentional rather than perched. If you're starting from a bare backyard, my create a cozy backyard from scratch guide walks through the layering order I'd use.
Pick pots with a low, wide profile. Tall narrow planters look leggy under a mantel and start competing with the drop line above them. IKEA's FROSTER planter in the 12-inch size hits the right proportions and survives a real freeze.
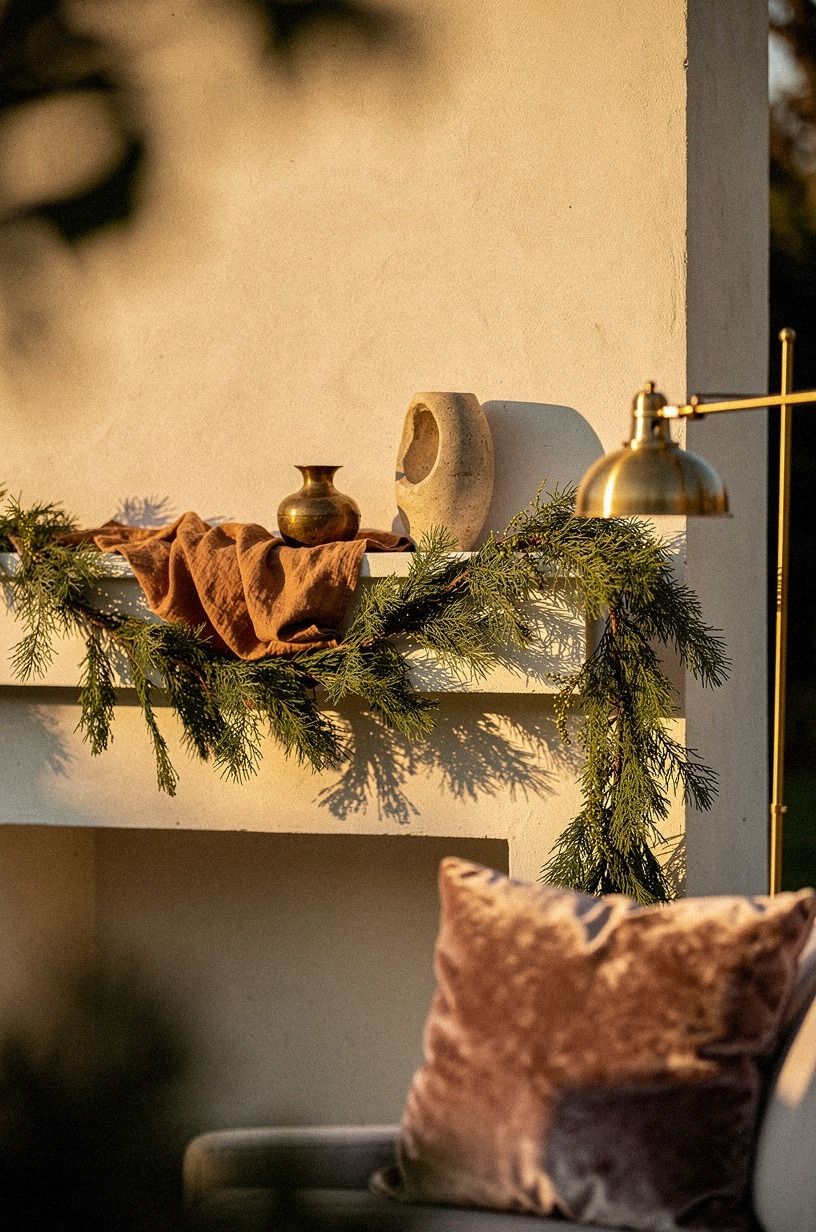
17Trail extra greenery toward the seating area
This is the move that makes the fireplace belong to the whole backyard instead of standing there as one decorated island.
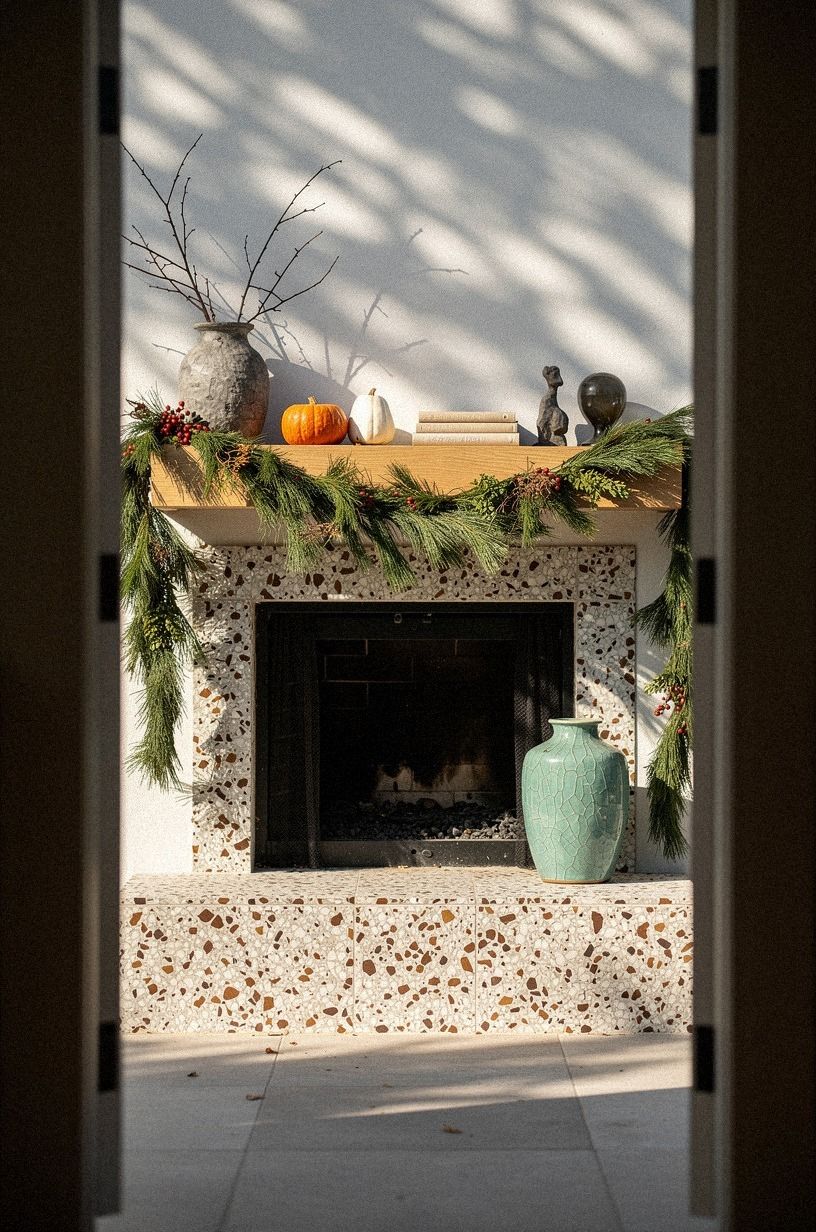
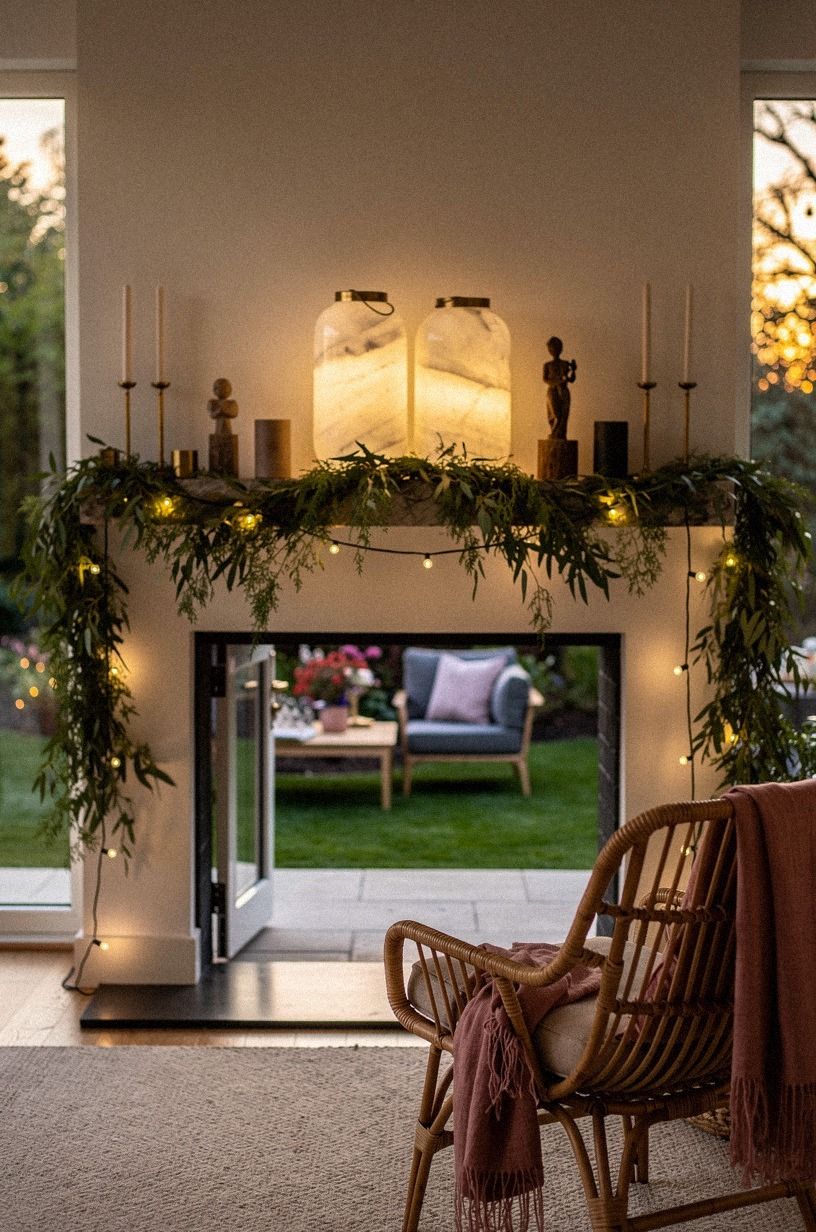
18Finish with lanterns tucked below the swag
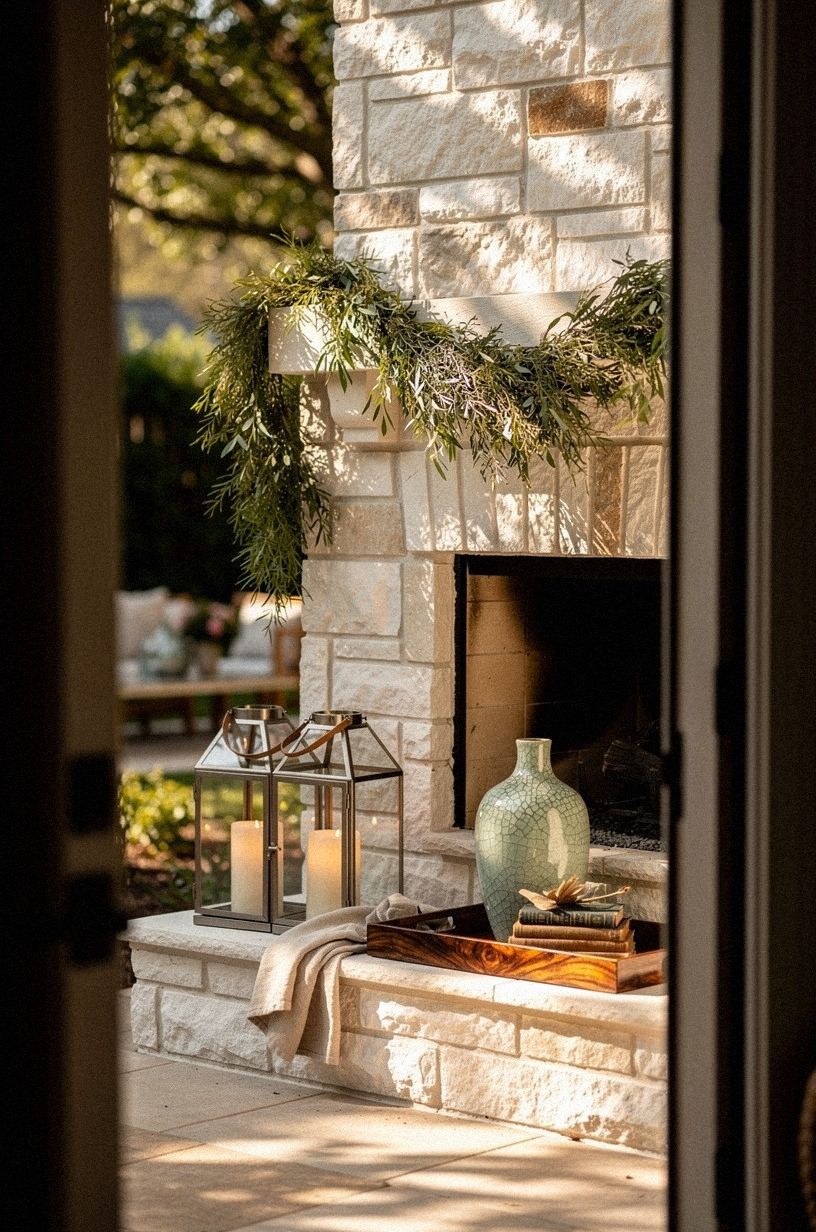
Last step, tuck lanterns below the swag so the whole lower half glows after sunset and the garland has a visual answer underneath it. I like the lanterns pushed just under the longer branch drop, where the metal and glass catch the greenery line without competing with it. That layered doorway view tells you fast whether the fireplace feels warm or merely decorated.
To get the warm-white temperature right across the whole backyard, my string lights beyond guide maps out the bulbs that hold up outdoors.
Use candlelight or warm rechargeable pillars, not glaring cool bulbs. And vary the heights a little so the lower zone feels collected.
A shorter lantern beside a taller one reads much better than identical twins lined up under the mantel. Target Threshold's Airlie lantern in matte black looks lovely against cedar and runs about $45, which is fair for a piece that survives a few winters.
If you only add one finishing layer after dark, make it this one. The glow under the swag is what turns a decent outdoor mantel into a place people drift toward. Total game changer after dark!
The Backyard Mantel Budget Ladder
Before you buy more garland, check the bigger picture. A dressed outdoor fireplace often looks expensive because the surrounding zone is edited well, not because the greenery budget was huge.
If your lanterns are undersized, your planters are flimsy, or your seating stops too far from the hearth, the mantel has to work too hard. A full cozy backyard aesthetic refresh usually beats throwing another garland at the problem. Bigger budget, more polished!
I use those ranges as guardrails, not marching orders. A stronger rug, better lights, and fuller planters usually move the needle more than doubling your garland spend.
Keep practical outdoor numbers in mind too: patio table height usually lands at 28 to 30 inches, and an umbrella should cover the table plus about 2 feet on each side. Real numbers keep the picture honest when you walk into a store.
Why Does the Hidden Spine Rule Work Better Than More Garland?
Because volume and weight are not the same thing. I used to think a fuller outdoor mantel just needed more greenery, but more greenery often means more drag, more slipping, and a line that goes flat by the second evening. The pool-noodle spine changes the geometry before it changes the budget.
You get a rounder face, a softer front edge, and a shape the cedar can wrap instead of trying to become by itself.
It also keeps you honest about where fullness should live. The prettiest outdoor mantel isn't packed from one corner to the other.
It's edited. One strong top line.
A believable drop on one side. Lower anchors that support the firebox.
Repeated materials that travel into the seating area.
That's the part nobody explains when you only see the finished photo. Fullness comes from silhouette first, not from endless extras. A solid cozy backyard winter setup follows the same logic from the fireplace out to the pergola.
I also think outdoor styling gets better when you respect distance. You rarely view a backyard fireplace from six inches away.
You see it from the grill, the dining table, the back door, the sofa by the rug. So the shape has to read from 10 feet away before the details matter.
That's why a hidden spine, removable hooks, and a few disciplined branch layers beat a giant wad of greenery every time. The method feels calmer, and your eye can read it faster.
And the money lesson is pretty honest. Put your dollars into the parts that stay useful after this season: better lanterns, better planters, one good strand of cedar, one reliable light set, maybe a paint refresh in Sherwin-Williams Emerald Exterior or Farrow & Ball Exterior Eggshell if the surround looks tired.
I wouldn't blow the whole budget on extra garland footage when structure is what fixes the look. Once the silhouette is right, the fireplace finally feels warm on purpose. Worth every dollar spent on structure.
The Questions Worth Answering First
What is the best garland on mantel setup for a small backyard?
The best setup for a small backyard is one rounded top line plus one side drop, because clear shape beats more volume when space is tight. I would keep the garland close to the mantel face, use smaller lanterns, and let the hearth stay open so your seating does not feel squeezed. A small backyard layout guide helps when the proportions feel off.
Where can I buy mantel garland pieces on a budget?
Try Target Threshold, IKEA, and Wayfair first for lanterns, hooks, ribbon, and planters. I also check Facebook Marketplace for bigger outdoor pots because that's where you can save real money. A thrifted planter with fresh cedar often looks better than a brand-new cheap set.
Ten bucks on Marketplace goes a long way!
How much does an outdoor mantel garland makeover cost?
A simple version usually lands around $100 to $300, especially if you already own lanterns or planters. The free part is reshaping what you have: fluffing branches, moving lights inward, and correcting the drape line. Those edits change more than people expect.
Can I create this outdoor mantel look on a budget?
Yes, and structure is what saves you money. Reuse last year's lanterns, bulk up one strand with the noodle spine, and echo the greenery in clipped branches near the seating area instead of buying multiple extra swags.
A smarter layout usually beats a bigger cart. Pair the mantel with the layering moves from my cozy backyard decor guide and the whole zone starts to feel styled.
Is garland on a mantel worth it in a small space?
Yes, because a small backyard benefits from one strong focal point even more than a big one does. Keep the garland tighter to the fireplace, use the hearth for vertical lanterns instead of wide decor, and make sure the front path still has that 36-inch clearance.
Is this mantel garland setup a good idea for a rental?
Yes, if you stick with removable hardware and portable layers. Use removable hooks, brick clips that fit without drilling, battery or solar lights, and potted evergreens instead of anything permanent. You still get the mood, and you aren't patching brick when the season ends.
What cedar length do I actually need for a 6-foot mantel?
Plan on 18 to 24 feet of cedar garland for a 6-foot mantel when you factor in the pool-noodle wrap and the hidden overlap at each post. Less than that and the line looks thin by the second evening. More than that and you are wasting budget on cedar that ends up tucked behind the mantel.
The One-Step Shape Rule I'd Start With
If I had to pick one move to begin with, I'd start with the pool noodle wrapped in cedar. More greenery won't fix a flat silhouette, but a hidden spine will. Pin that first step for later and let the rest of the mantel build from a shape that already reads full.


