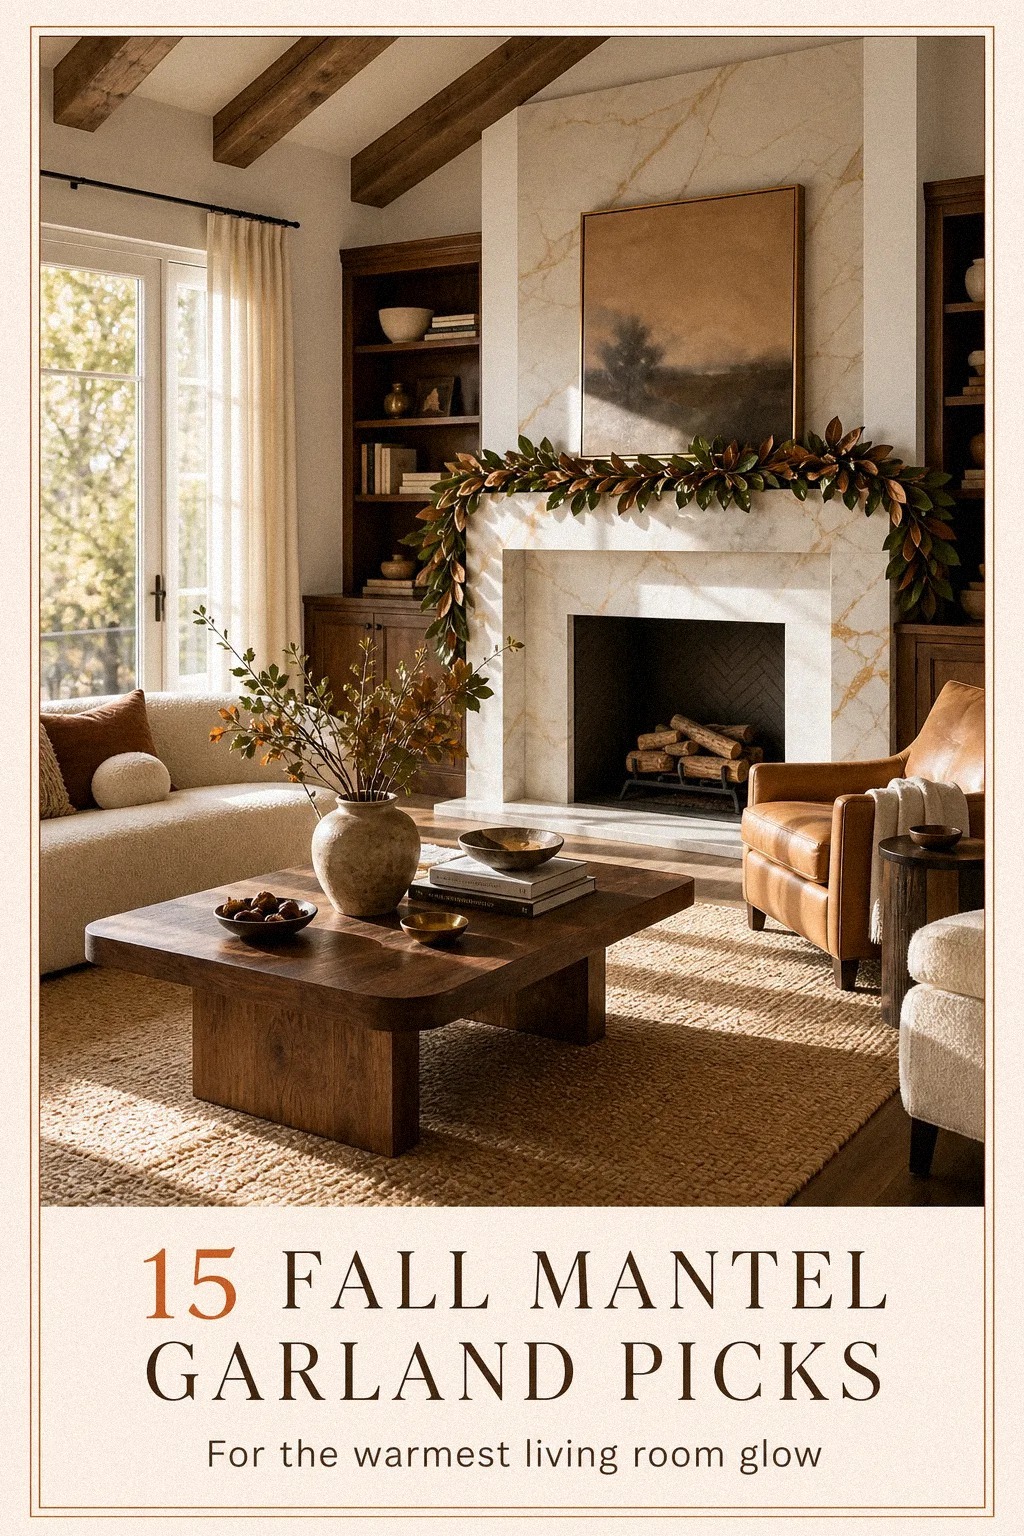
How to Style Fall Mantel Garland From Magnolia to Dried Florals
25 june 2026A fall mantel garland that looks finished, not fussy, usually comes down to one strong base, two anchor materials, and a clear stop point. I learned that after one year when I kept stuffing leaves, ribbon, and pumpkins across my mantel until the fireplace looked shorter than it was. Your living room does not need more fall stuff. It needs a better order.
- ✓ Start with a loose magnolia leaf garland
- ✓ Anchor the garland with caramel velvet pumpkins
- ✓ Layer fresh eucalyptus through the center swag
- Start with a loose magnolia leaf garland
- Anchor the garland with caramel velvet pumpkins
- Layer fresh eucalyptus through the center swag
- Hang tiny fall wreaths from brass hooks
- Build height with amber glass candlesticks
- Tuck dried orange slices between magnolia leaves
- Weave burgundy maple stems along the mantel
- Drape oatmeal ribbon in soft uneven loops
- Cluster mini grapevine wreaths near one end
- Add pinecones under the lowest garland dips
- Lean moody autumn art behind the foliage
- Frame the firebox with woven basket lanterns
- Place copper bells beside the pumpkin cluster
- Trail bittersweet vines down one mantel side
- Finish with warm micro lights tucked underneath
1Start with a loose magnolia leaf garland
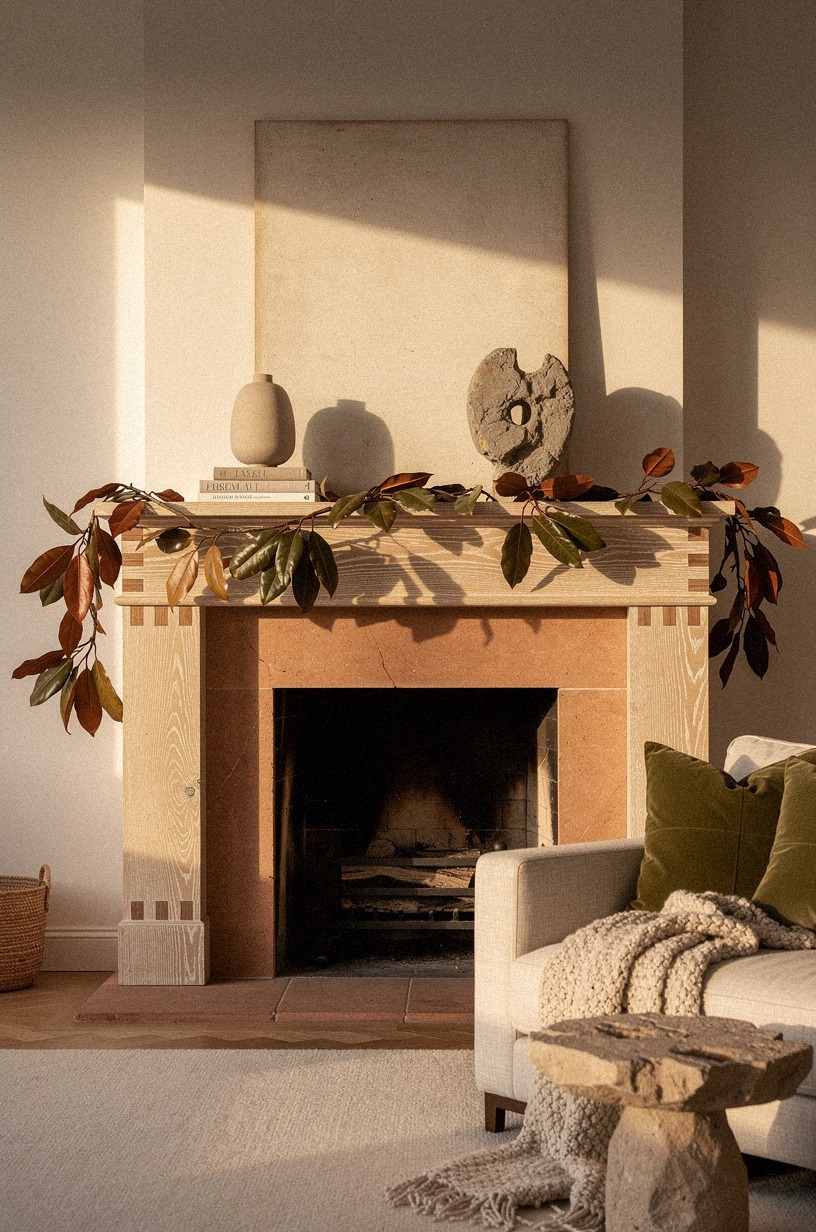
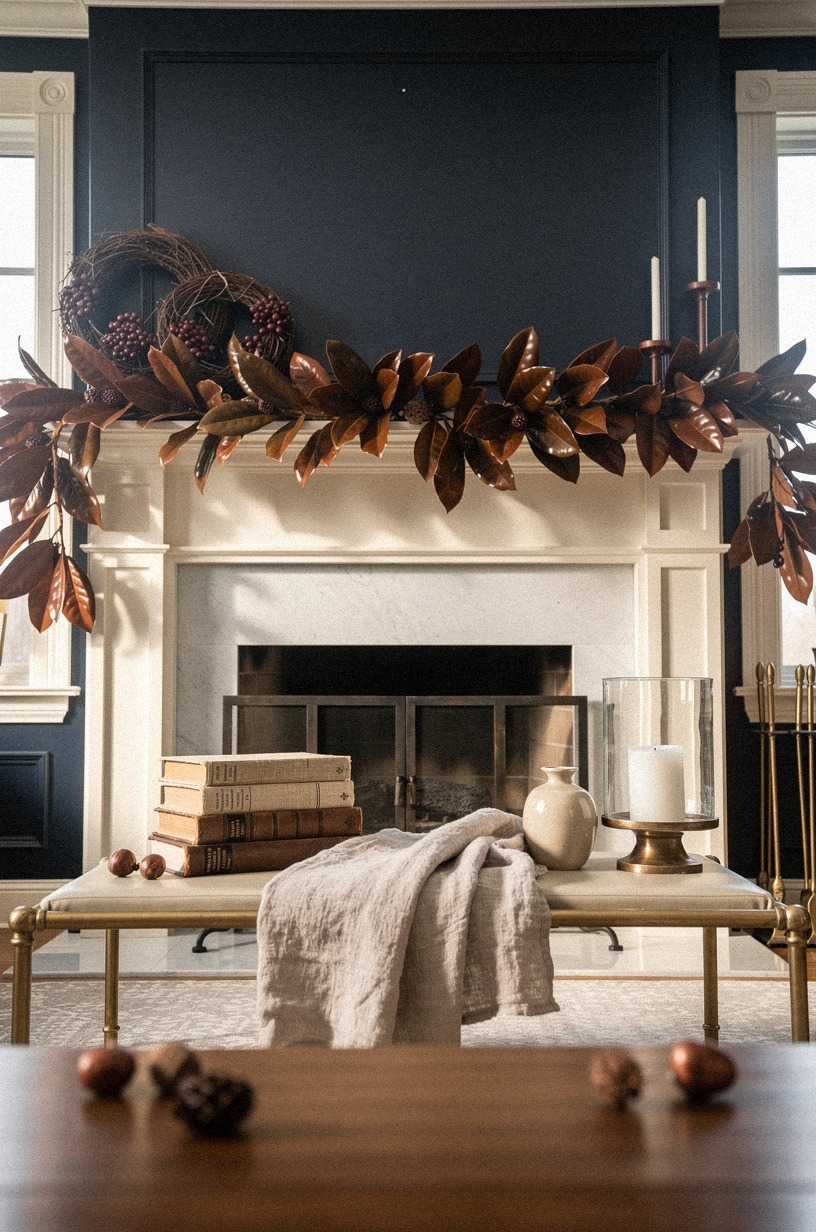
Start with a loose magnolia leaf garland before you buy anything else, because the base line decides whether your mantel reads collected or crowded. On a cerused white oak mantel with exposed dovetail joints, I like the garland to span almost the full width but still leave 4 to 6 inches of oak visible at both ends. You want to see the shelf.
That's part of the charm.
Let the center sag only a little, not like a party streamer. If you pull it tight, your fresh fall garland looks stiff.
If you let it droop too far, it cuts the firebox in half and steals all the architecture. I usually fluff the magnolia so some brown undersides show forward and some glossy green tops recede.
That two-tone leaf is doing more work than people think.
And keep the room symmetrical at this stage, even if you plan to loosen it later. Stand back, check the line, then adjust from the doorway where you normally enter. If you want a calmer benchmark before you add the rest, my simple fall mantel guide shows why the base layer matters so much.
Typical cost by tier (US averages):
2Anchor the garland with caramel velvet pumpkins
Anchor the first low points with caramel velvet pumpkins so your eye lands somewhere warm right away. I prefer two medium pumpkins and one smaller one, never five matching minis, and I want them pushed slightly off center rather than parked like bookends. In that first-person view as you step into the living room, this is the cluster that tells you the mantel has weight.
The fabric matters. A pumpkin in 18 oz cotton velvet catches light softly and doesn't throw fake shine back at you.
I like caramel more than bright orange here because it sits better with magnolia brown, cream plaster, and pale oak. If your wall color already leans warm, even better.
If it leans cooler, a touch of Benjamin Moore Revere Pewter HC-172 nearby helps the pumpkin color feel intentional.
But don't jam the pumpkins into the middle. Tuck them into one dip so the garland still feels airy. You need a base, not a blockade.
For more low, warm grouping ideas around the hearth, see my cozy fall mantel ideas that make you want to light the fire. A loose asymmetric cluster always looks more expensive than a perfectly paired set, and that's the whole point!
3Layer fresh eucalyptus through the center swag

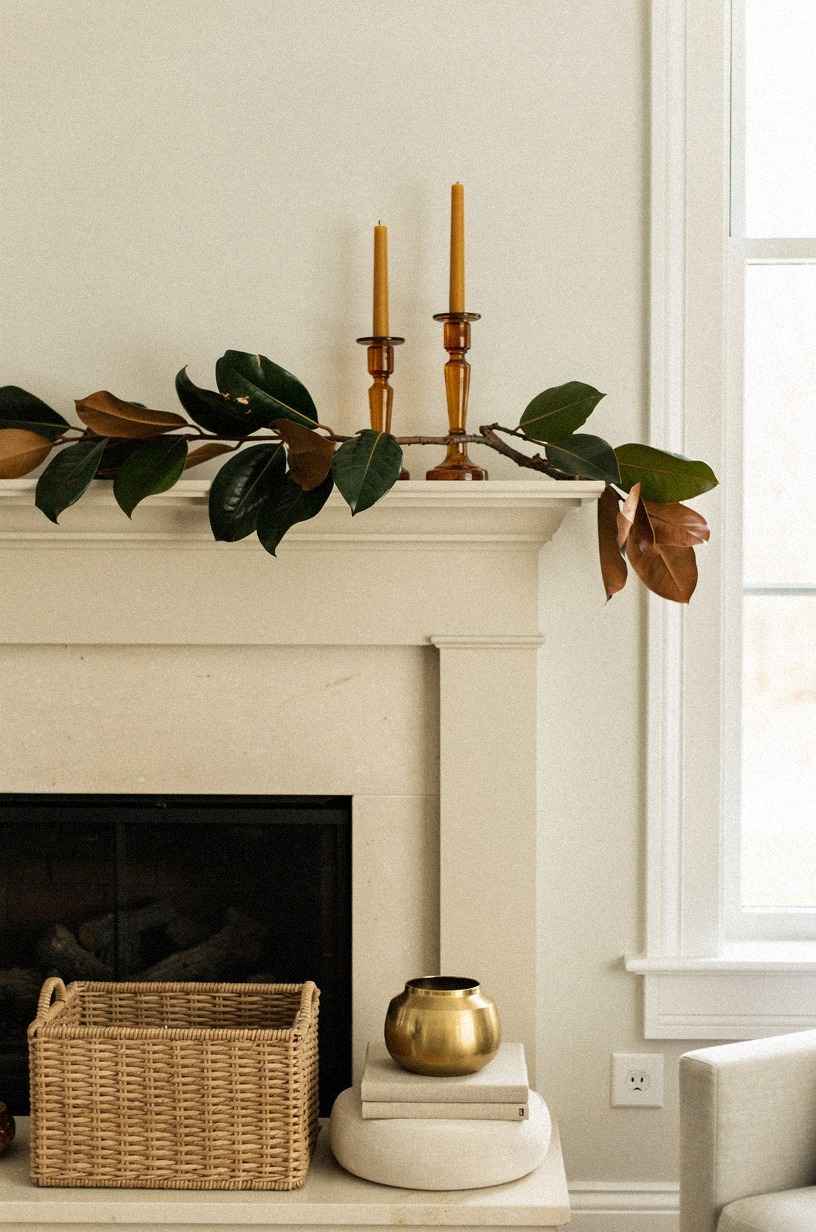
Layer fresh eucalyptus through the center swag after the magnolia line is set, because you're softening, not rebuilding. In an overhead view, I want the eucalyptus to run through the middle like a lighter ribbon of movement, never puffed into a separate garland. One or two stems at a time works better than a whole bunch dropped in at once.
Choose a muted variety if you can. Silver dollar eucalyptus is easy, but I like seeded or willow eucalyptus more because the shape breaks up the broad magnolia leaves. That little shift keeps your magnolia garland mantle fall setup from feeling flat.
Lay the stems so the airy ends feather outward and the thicker ends disappear underneath the leaf spine.
I call this the Soft-Center Rule. The center should look breathable, not stuffed.
Why do so many garlands go wrong? Because people keep adding until the branch line turns into a hedge.
If you want a second example of a lighter hand, my how to decorate a fall mantel step by step guide makes the same point in a simpler build. You'll see the difference the moment you step back from the room.
4Hang tiny fall wreaths from brass hooks
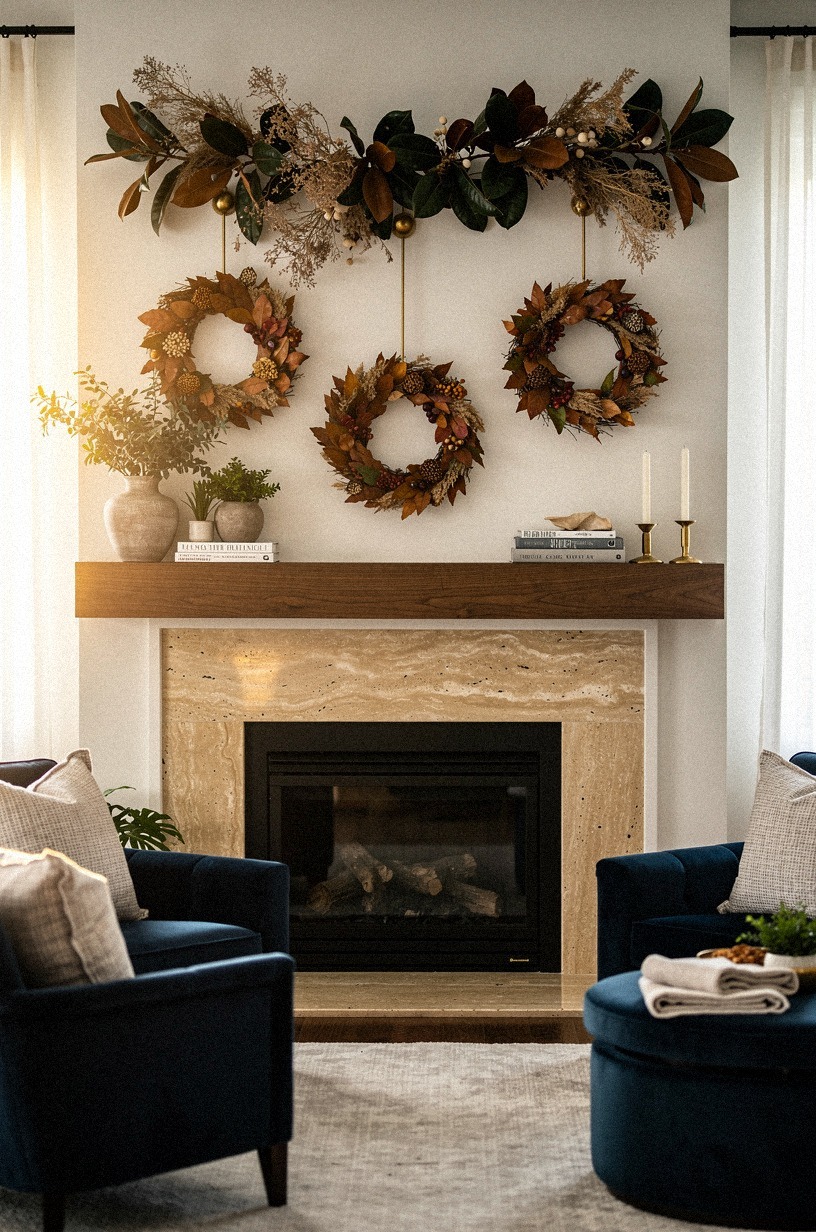
Hang tiny fall wreaths from brass hooks only after the main garland line feels settled, because these are accents, not the star. In a perfectly front-on room, two or three little wreaths tucked beneath the garland add repetition without asking for another whole object on the shelf. I like grapevine or wheat bases no bigger than 8 inches across.
Use small unlacquered brass cup hooks if the mantel can take them, or removable brass-look hooks if you rent. The warm metal matters more than the exact brand.
Bright chrome looks cold against magnolia. Brass picks up the caramel pumpkin tones and the brown leaf undersides, so the whole thing starts talking to itself.
But keep the wreaths high enough that they skim the garland edge, not hang like ornaments from a tree. You want a whisper under the greenery, not a second decorative row.
For more ways to keep small fall wreaths from turning cute in the wrong way, my rustic fall mantel ideas help with proportion. You're not decorating a Christmas tree, and you'll see the difference fast.
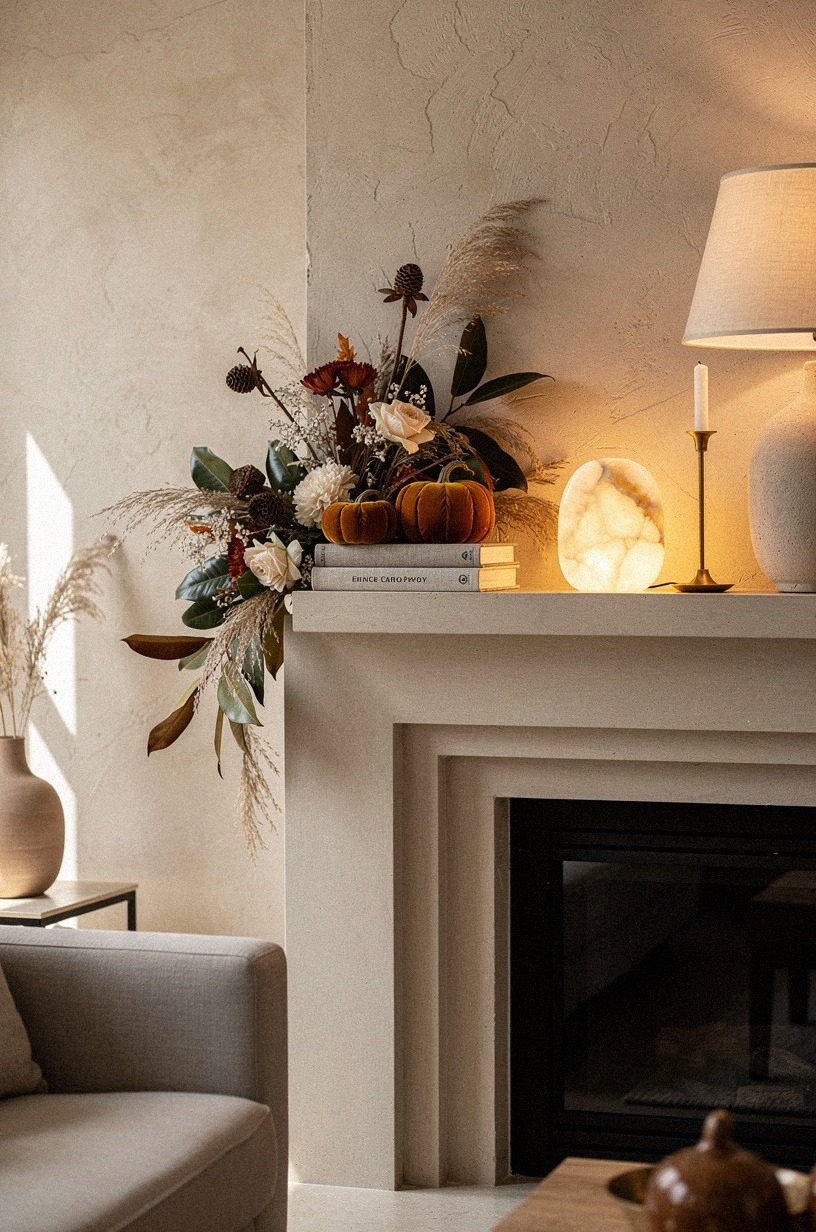
5Build height with amber glass candlesticks
Build height with amber glass candlesticks once the lower layer feels grounded, because your mantel needs a skyline after all that softness.
6Tuck dried orange slices between magnolia leaves
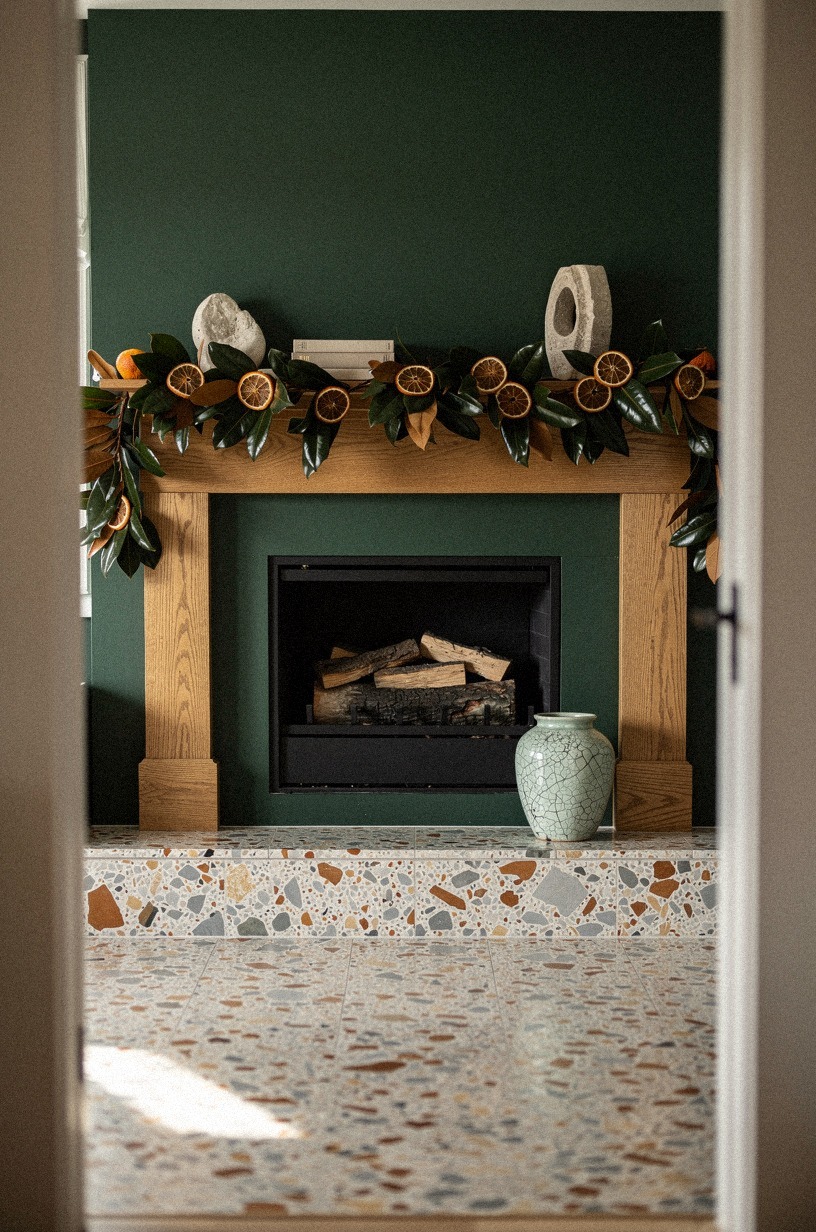
Tuck dried orange slices between the magnolia leaves when the base still feels a little too serious. The slices bring a tiny bit of glow and shape, especially when you see the mantel through a doorway and catch those pale orange rounds against all the greens and browns. I use them sparingly, mostly near the center and one side, never end to end.
The move is placement without looking placed. Slide a slice halfway behind a leaf so only part of the circle shows, then rotate the next one so the peel edge catches more light.
If every slice faces front, it starts reading craft project. I also like slices around 2 to 3 inches wide because the scale stays delicate against larger magnolia leaves.
But keep your spacing loose. One every 10 to 12 inches is usually plenty for a standard mantel.
You're adding flickers of color, not spelling autumn in citrus. If you want to push the harvest side a little further than this, my farmhouse fall mantel ideas show where that fuller version works.
You'll know you've overdone it the second it looks like a craft fair.
7Weave burgundy maple stems along the mantel
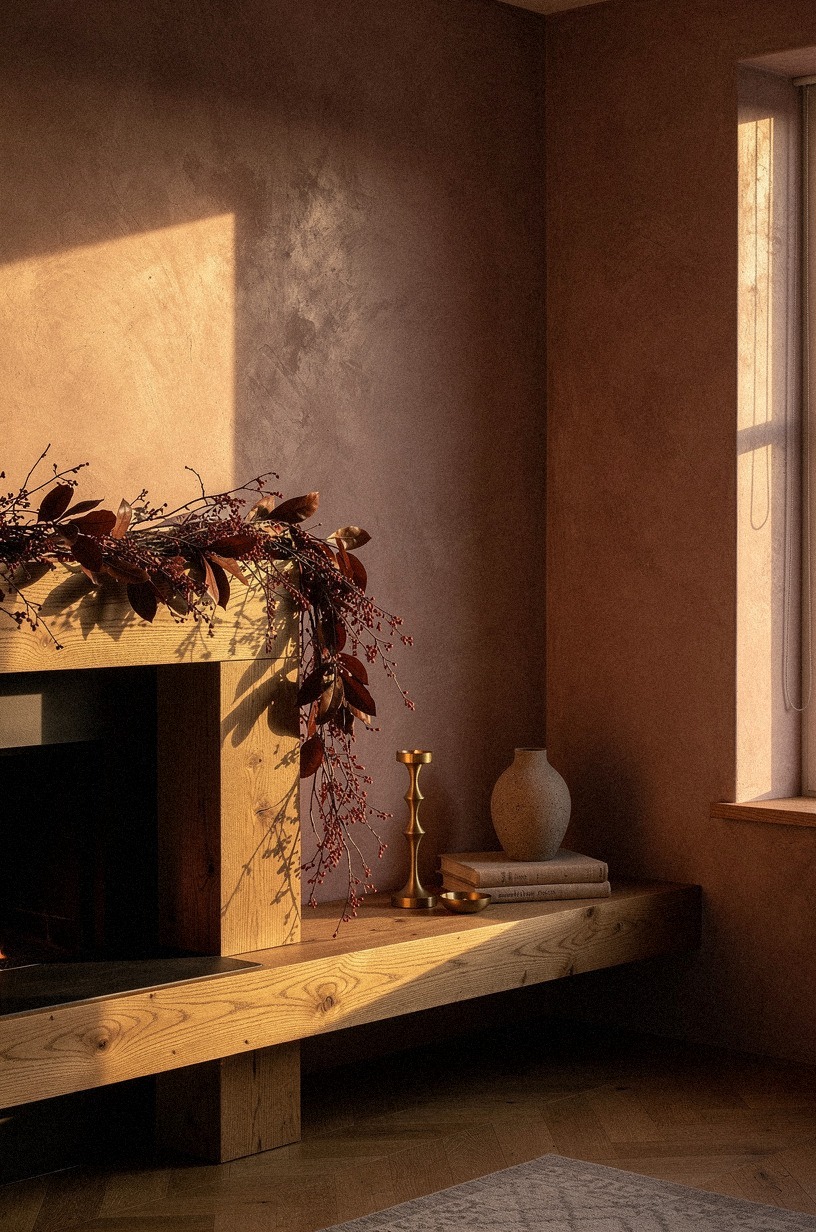
Weave burgundy maple stems along the mantel after the oranges are in, because you need one deeper note to stop the palette from going pale.
8Drape oatmeal ribbon in soft uneven loops
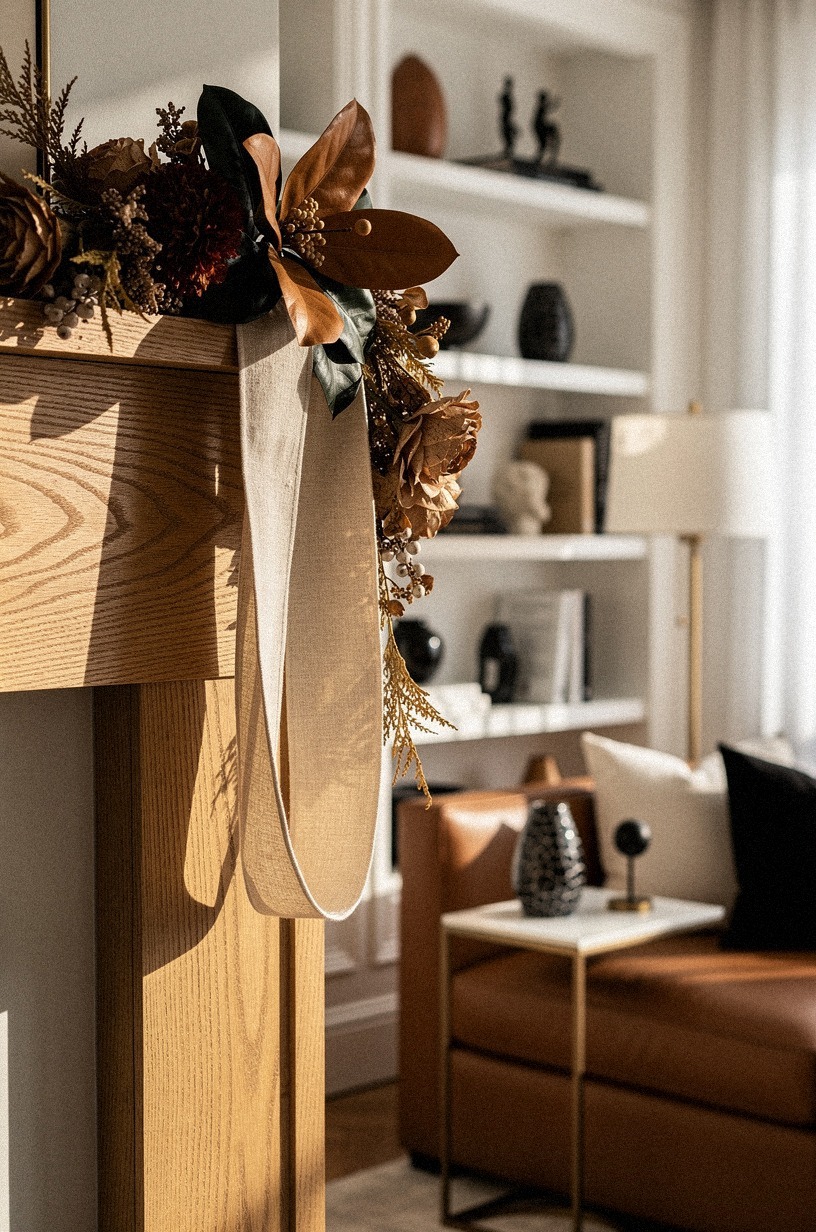
Drape oatmeal ribbon through the garland only after the foliage has real shape, because ribbon should answer the line, not create it. In a relaxed three-quarter view, I want the loops to feel almost accidental, with one longer drop and one tighter bend instead of two matching scallops.
Symmetry can be handsome. Matching loops are usually just stiff.
Use a ribbon with body. A 2-inch wired linen ribbon in oatmeal or warm flax holds a lazy curve better than satin, and it does not flash at you every time the room light changes. I like to thread it through the back of the garland in two or three places, then let the front dips happen naturally rather than pinning every inch.
But don't thread ribbon all the way through like lacing a shoe. You want pauses where leaf and branch can still show.
That's what keeps the mantel from turning into one giant fabric braid. For a simpler version of that softer line, my simple fall mantel guide is useful.
You can always add more ribbon later, but you can't un-stiff a sloppy first pass.
9Cluster mini grapevine wreaths near one end
Cluster mini grapevine wreaths near one end when the arrangement still feels too even. In that dramatic low floor-level view facing the fireplace, one denser side gives the whole mantel a destination, and the wreath texture adds a dry, woody break from all the leaves. I like two wreaths overlapped and a third leaned slightly behind if the mantel is wide enough.
Keep the cluster near the end, not the center. The point is to create a weighted edge so your eye travels across the shelf.
A natural grapevine twig base works best because it echoes the dried stems without looking identical to them. If you use wreaths wrapped in faux berries or glittery vines, the whole thing gets busy fast.
And leave some negative space between the cluster and your candlesticks. Those little gaps are where the expensive feeling comes from.
You don't need every inch occupied. If you want more texture-first fireplace styling that stays relaxed, my rustic fall mantel ideas can take you further.
The eye is doing the work, not the wreath count, and you'll feel that immediately.
10Add pinecones under the lowest garland dips

Add pinecones under the lowest dips after the larger moves are done, because pinecones are support players.
11Lean moody autumn art behind the foliage
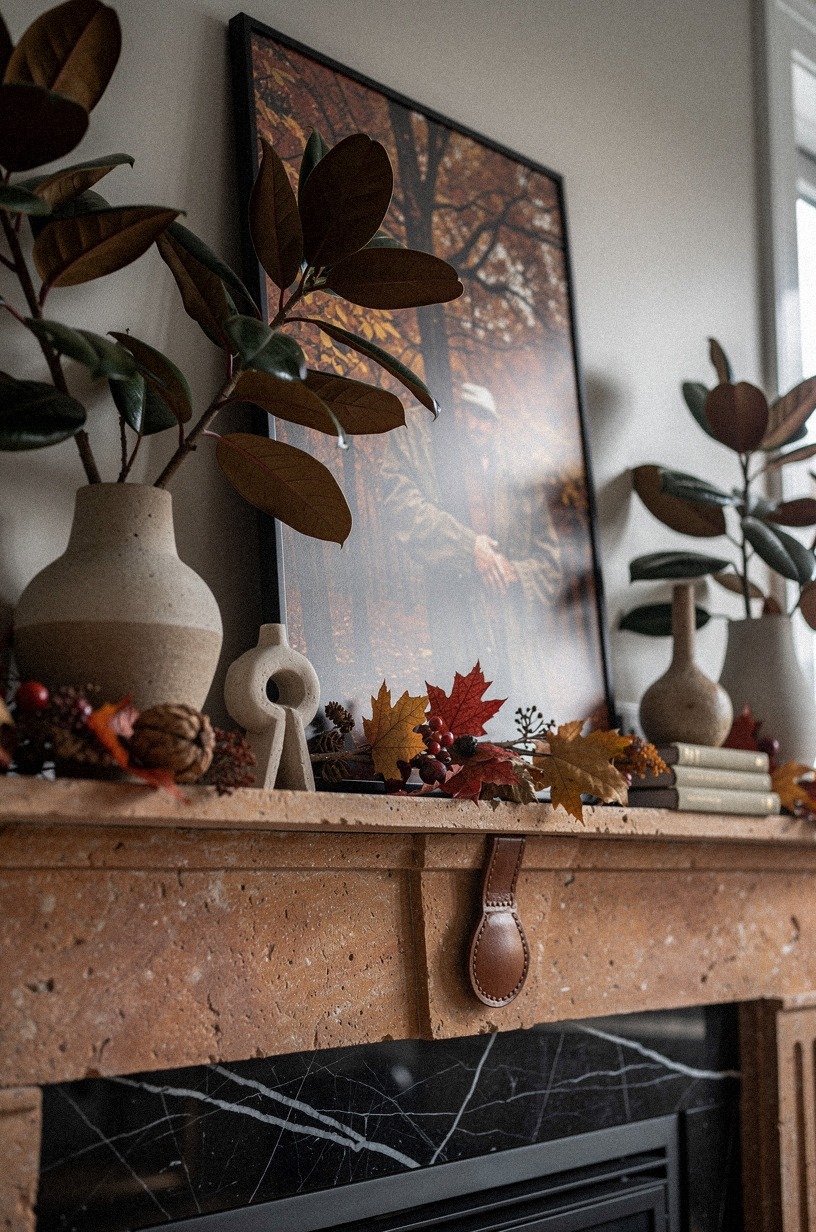
Lean moody autumn art behind the foliage when the wall above the mantel feels too blank but you don't want a hard, formal installation. Seen low across the mantel surface, a dark landscape or abstract with smoky browns and olive notes gives you atmosphere without introducing another seasonal object. I prefer art that is at least two thirds of the firebox width so it reads from the sofa.
A slim IKEA HOVSTA oak-effect frame can work if the print has enough mood, and a deeper West Elm frame works if the room already has heft elsewhere. What matters is that the foliage partly overlaps the lower edge.
That overlap is what makes the whole thing feel layered instead of lined up. If the art sits fully exposed, it starts looking staged.
And please skip quote signs. You don't need the wall to explain the season to anyone.
You need color, shadow, and one quiet rectangle behind the leaves. For more examples of art carrying the mood instead of the message, my cozy fall mantel ideas that make you want to light the fire get this right.
12Frame the firebox with woven basket lanterns
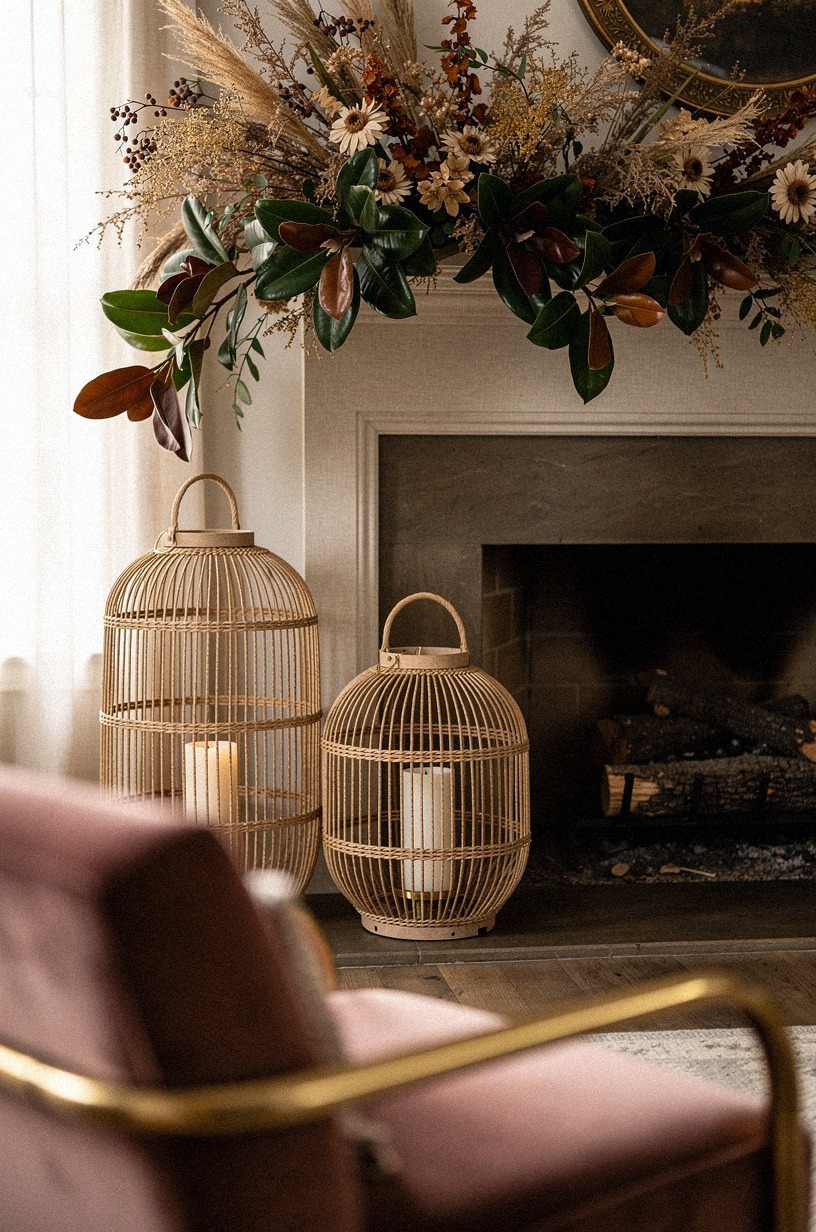
Frame the firebox with woven basket lanterns once the mantel shelf looks finished, because the lower half of the fireplace needs to answer the upper half.
13Place copper bells beside the pumpkin cluster
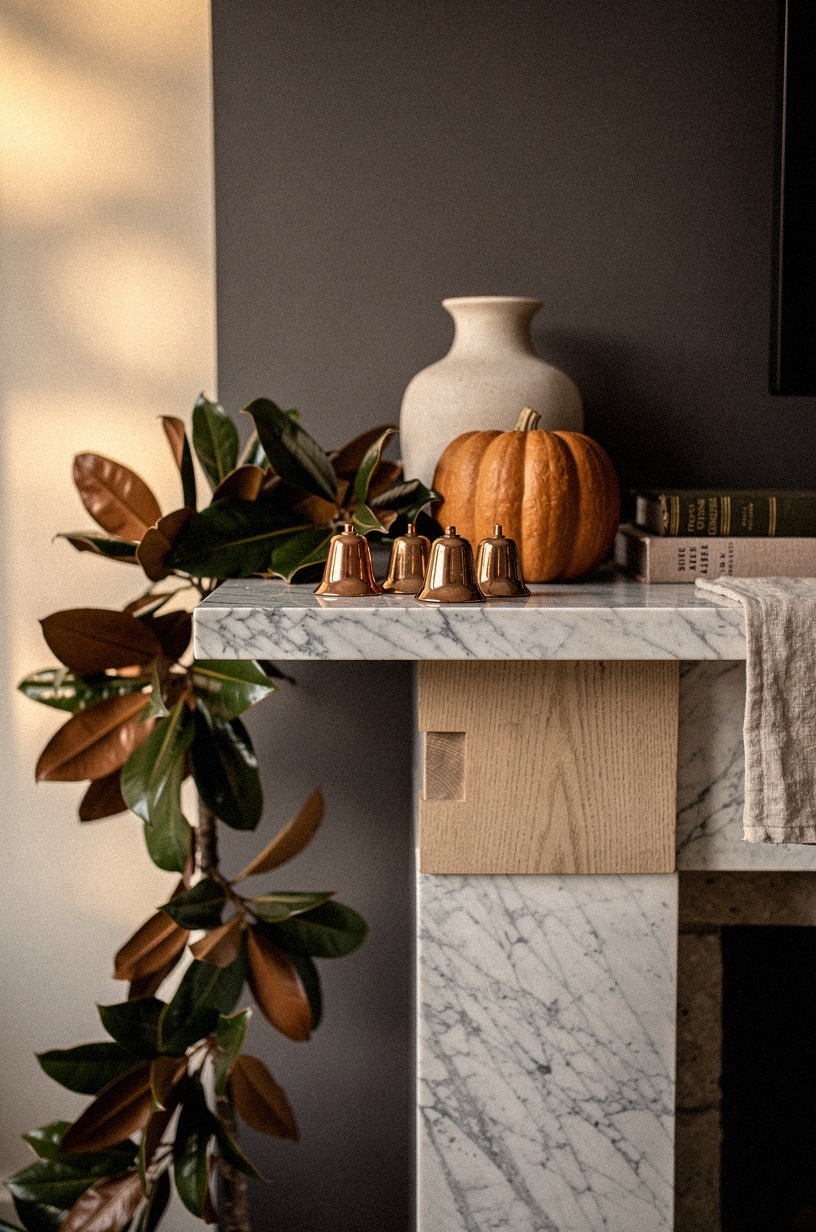
Place copper bells beside the pumpkin cluster after you have your lower shapes sorted, because bells behave like jewelry. In a wide diagonal living room scene with breathing room, they give the caramel pumpkins a sharper edge and pull a little extra warm metal into the mix. I like two bells, maybe three, tied with thin jute or velvet and set low.
A softly aged copper finish is better than bright brass here because it sits between orange and brown. That bridge matters.
If your pumpkins are velvet and your leaves already show brown undersides, the bells keep the cluster from turning muddy. I tuck them so one almost disappears behind the pumpkin and one catches the light at the front.
But bells are a side note, not the melody. If you can hear them visually from across the room, you've used too many.
It's a glint, not a chorus! For another lesson in warm metal restraint, my rustic fall mantel ideas are helpful.
14Trail bittersweet vines down one mantel side

Trail bittersweet vines down one mantel side when the arrangement still feels too horizontal. In that first-person walk toward a centered fireplace wall, one trailing side gives you movement and softens the strict shelf line without collapsing the symmetry you built earlier. I want the vine to start inside the main garland, then spill down one side as if it found its own way.
Use a narrow dried vine stem and guide it with hidden floral wire or removable clear clips if you need to. The trail should skim the side of the mantel, not snake across the front.
And keep the drop believable. I like a vine that lands somewhere above the hearth, not all the way to the floor, because a shorter trail feels intentional and grown-up.
But don't mirror it on the other side. That is where the whole thing stops feeling editorial and starts feeling event decor.
One side is enough. The asymmetry is the point. If you want to study that balance in a more stripped-back build, my how to decorate a fall mantel step by step guide is worth a look.
You can always add the second trail later, but you can't undo the symmetry once the guests see it!
15Finish with warm micro lights tucked underneath
Finish with warm micro lights tucked underneath the garland after everything else is set, because light should reveal your work, not dictate it.
Why this mantel reads richer when you stop earlier
I've styled enough fall fireplace walls to know the expensive version is rarely the fullest one. It's usually the one that stops on time. The mistake I made early on was assuming a bare inch meant an unfinished inch.
So I kept adding. Another stem. Another pumpkin.
Another bell. And then the mantel lost the very thing I liked about it in the first place, which was the architecture. A mantel isn't a table centerpiece.
It's a shelf attached to a wall that already has weight, shadow, trim, and a firebox below it. That's a lot before you even start.
What changed for me was realizing that you don't layer warmth on top of panic. You layer it on top of structure.
If the magnolia line is good, if the pumpkin cluster has real weight, if the candlesticks give you height, you're mostly done. The rest is editing.
That's why I care so much about the oak still showing, the ribbon not matching too neatly, and the lower firebox area staying calm. Your eye needs a path.
If every object is shouting for its turn, your living room feels smaller the second you walk in.
The money part is pretty plain too. Spend on the material that stays handsome up close. A 3/4-inch solid white oak mantel.
A ribbon that has body. Better faux pumpkins if you use faux. Real eucalyptus if you can grab it cheaply.
I would not blow the budget on six novelty accents before I handled the basics around the fireplace, the sofa, and the rug. If your room already has a balanced rug size, maybe 9x12, and the seating faces the hearth properly, the mantel doesn't have to overperform. It just has to connect. You'll be surprised how far $300 goes when the base layer is honest.
And that's the part people skip because it isn't as fun as shopping. Connection.
The garland should relate to the wall color, the pumpkins should make sense with the upholstery, and the lower lanterns should answer the weight above them. I still go back and forth on whether a mantel needs art every time. Sometimes yes. Sometimes no.
But I never regret stopping one layer earlier than my first impulse. I regret the opposite every single time! If you want to see how this restraint plays in a different room, my simple fall mantel guide and my rustic fall mantel ideas both stay in this same lane. You'll feel the difference in your own living room the same week.
What People Always Want to Know
What is the best Fall Mantel Garland Ideas, From Magnolia to Dried Florals for a small living room?
The best version for a small room is a loose magnolia base with one pumpkin cluster and one candle grouping. Clear sightlines matter more than more objects.
I'd keep the garland slim, use one side accent only, and borrow the restraint from this simple fall mantel guide. You can always add more next year, but a quieter first build will read better in a tight space.
Where can I buy Fall Mantel Garland Ideas, From Magnolia to Dried Florals pieces on a budget?
I'd start with Target Threshold, IKEA, and Wayfair for ribbon, lanterns, candleholders, and frames. Budget mixing works better than one-store shopping.
Then I'd check Facebook Marketplace or a thrift store for grapevine wreaths, bells, and older art with some age already built in. You'll find the same warm look for half the price.
How much does a Fall Mantel Garland Ideas, From Magnolia to Dried Florals makeover cost?
A typical mantel-only refresh runs about $100 to $300, depending on whether you already own candles, art, or lanterns. The free move is editing what you have first.
I'd spend earliest on the garland base and the lights because those two choices change the wall fastest. You can keep the rest honest and still come in under $150 if you're patient.
Can I create a Fall Mantel Garland Ideas, From Magnolia to Dried Florals on a budget?
Yes, and you should start there. Low-cost styling often looks better because it forces you to stop sooner. Clip yard branches, dry your own orange slices, reuse baskets as lantern shells, and buy one better ribbon instead of five filler accents.
That order keeps the mantel calmer, and you'll see the difference the first time you walk in.
Is a Fall Mantel Garland Ideas, From Magnolia to Dried Florals worth it in a small space?
Yes, because a small living room gives the fireplace more visual authority. One strong focal point can warm the whole room if the rest of the shelf stays edited.
Keep the garland shallow, let one side trail, and avoid stacking decor all the way across the mantel. You can always layer in more next year when the foundation is right.
Is Fall Mantel Garland Ideas, From Magnolia to Dried Florals a good idea for a rental?
Yes, if you use no-damage swaps. Rental-safe warmth comes from removable hooks, clear clips, battery lights, and leaning art instead of drilling.
I'd skip permanent hooks, use wire hidden inside the foliage, and keep the lanterns resting on the hearth rather than fixed to anything. You'll get the same warm look, and your deposit stays intact.
Where I'd Start First
If I had to pick one step to start with, I'd start with the loose magnolia base. If that line is wrong, every pumpkin, bell, and light fights it instead of helping. Pin that first move for later and build the rest only after the shelf breathes.


